
 List Manager example
Movie Watchlist
September 21, 2026

Live result on the frontend
The Movie Watchlist list turns a MySQL table of 24 films into a wall of 2:3 posters. Each poster gets its colour and watermark icon from the genre, shows the title in big letters with the director, year and star rating, and carries a Watched or Queued badge. A click opens the runtime and personal notes.
What it shows
A personal or club watchlist that is pleasant to browse:
- Poster cards — four columns on desktop, three on tablets and two on phones; every card keeps a 2:3 aspect ratio.
- Filters — genre as a group of checkboxes (tick several at once), a Watched/Queued drop-down and a search box over title, director, genre and notes.
- Stars and badges — the numeric rating is drawn as stars and the status as a badge, using only CSS attribute selectors on the values.
- Detail pop-up — clicking a poster opens a coloured header with the title and director, the status, runtime, rating and notes.
How it’s built
The list uses the Card layout with the number of columns set for each device. The poster HTML is written once with ##field## placeholders; the genre label becomes a CSS class (g-Sci-Fi) that sets the gradient and the watermark icon, which is why the option-list labels are single tokens.
The 2:3 shape comes from CSS aspect-ratio, and the title size scales with the width of the poster through container units, so the same design works in a wide desktop grid and in a two-column phone layout. A rating of 0 means “not rated yet” and shows a small text instead of stars.
The database is the table lm_movies with 24 sample rows (see the SQL download); the list configuration is a single XML file created with the Export Configuration button.
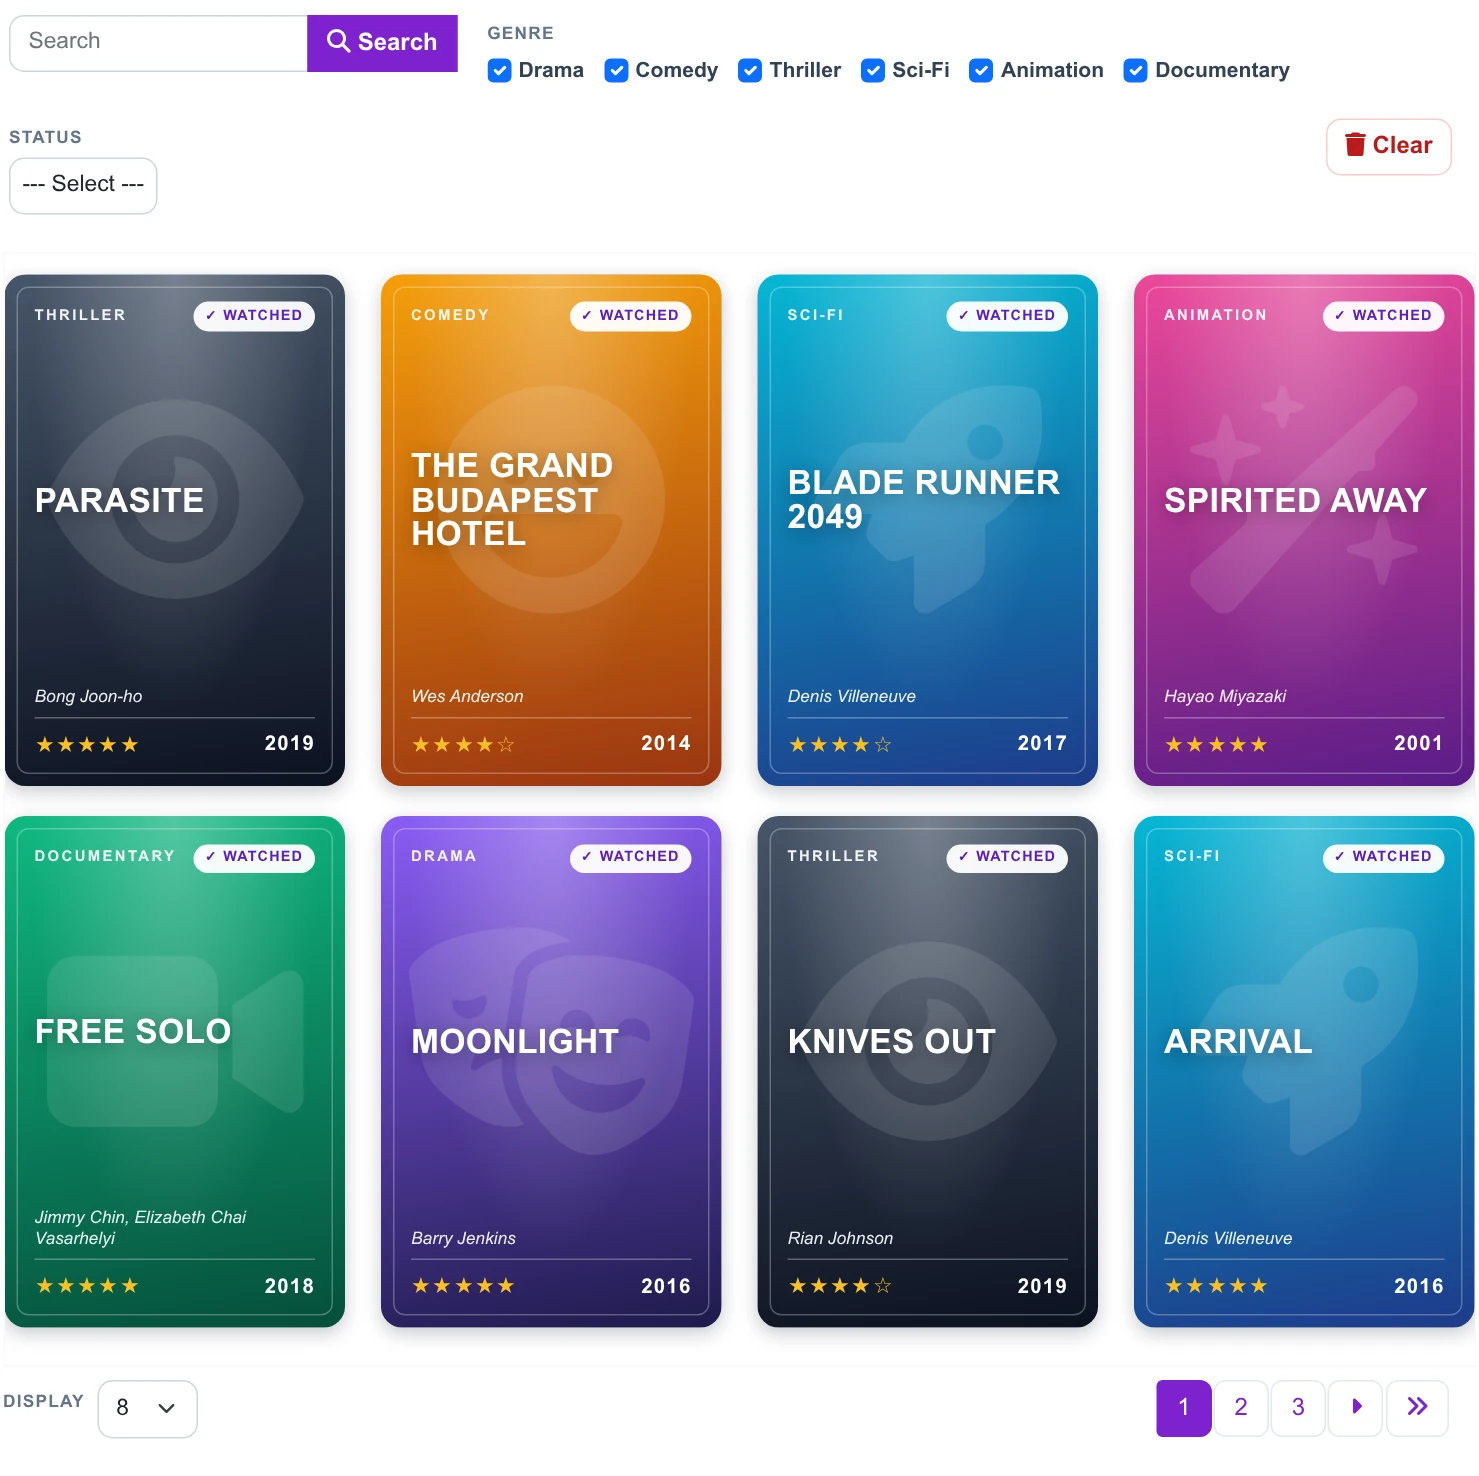
The whole list on the frontend: toolbar with search and filters, poster grid and pagination.
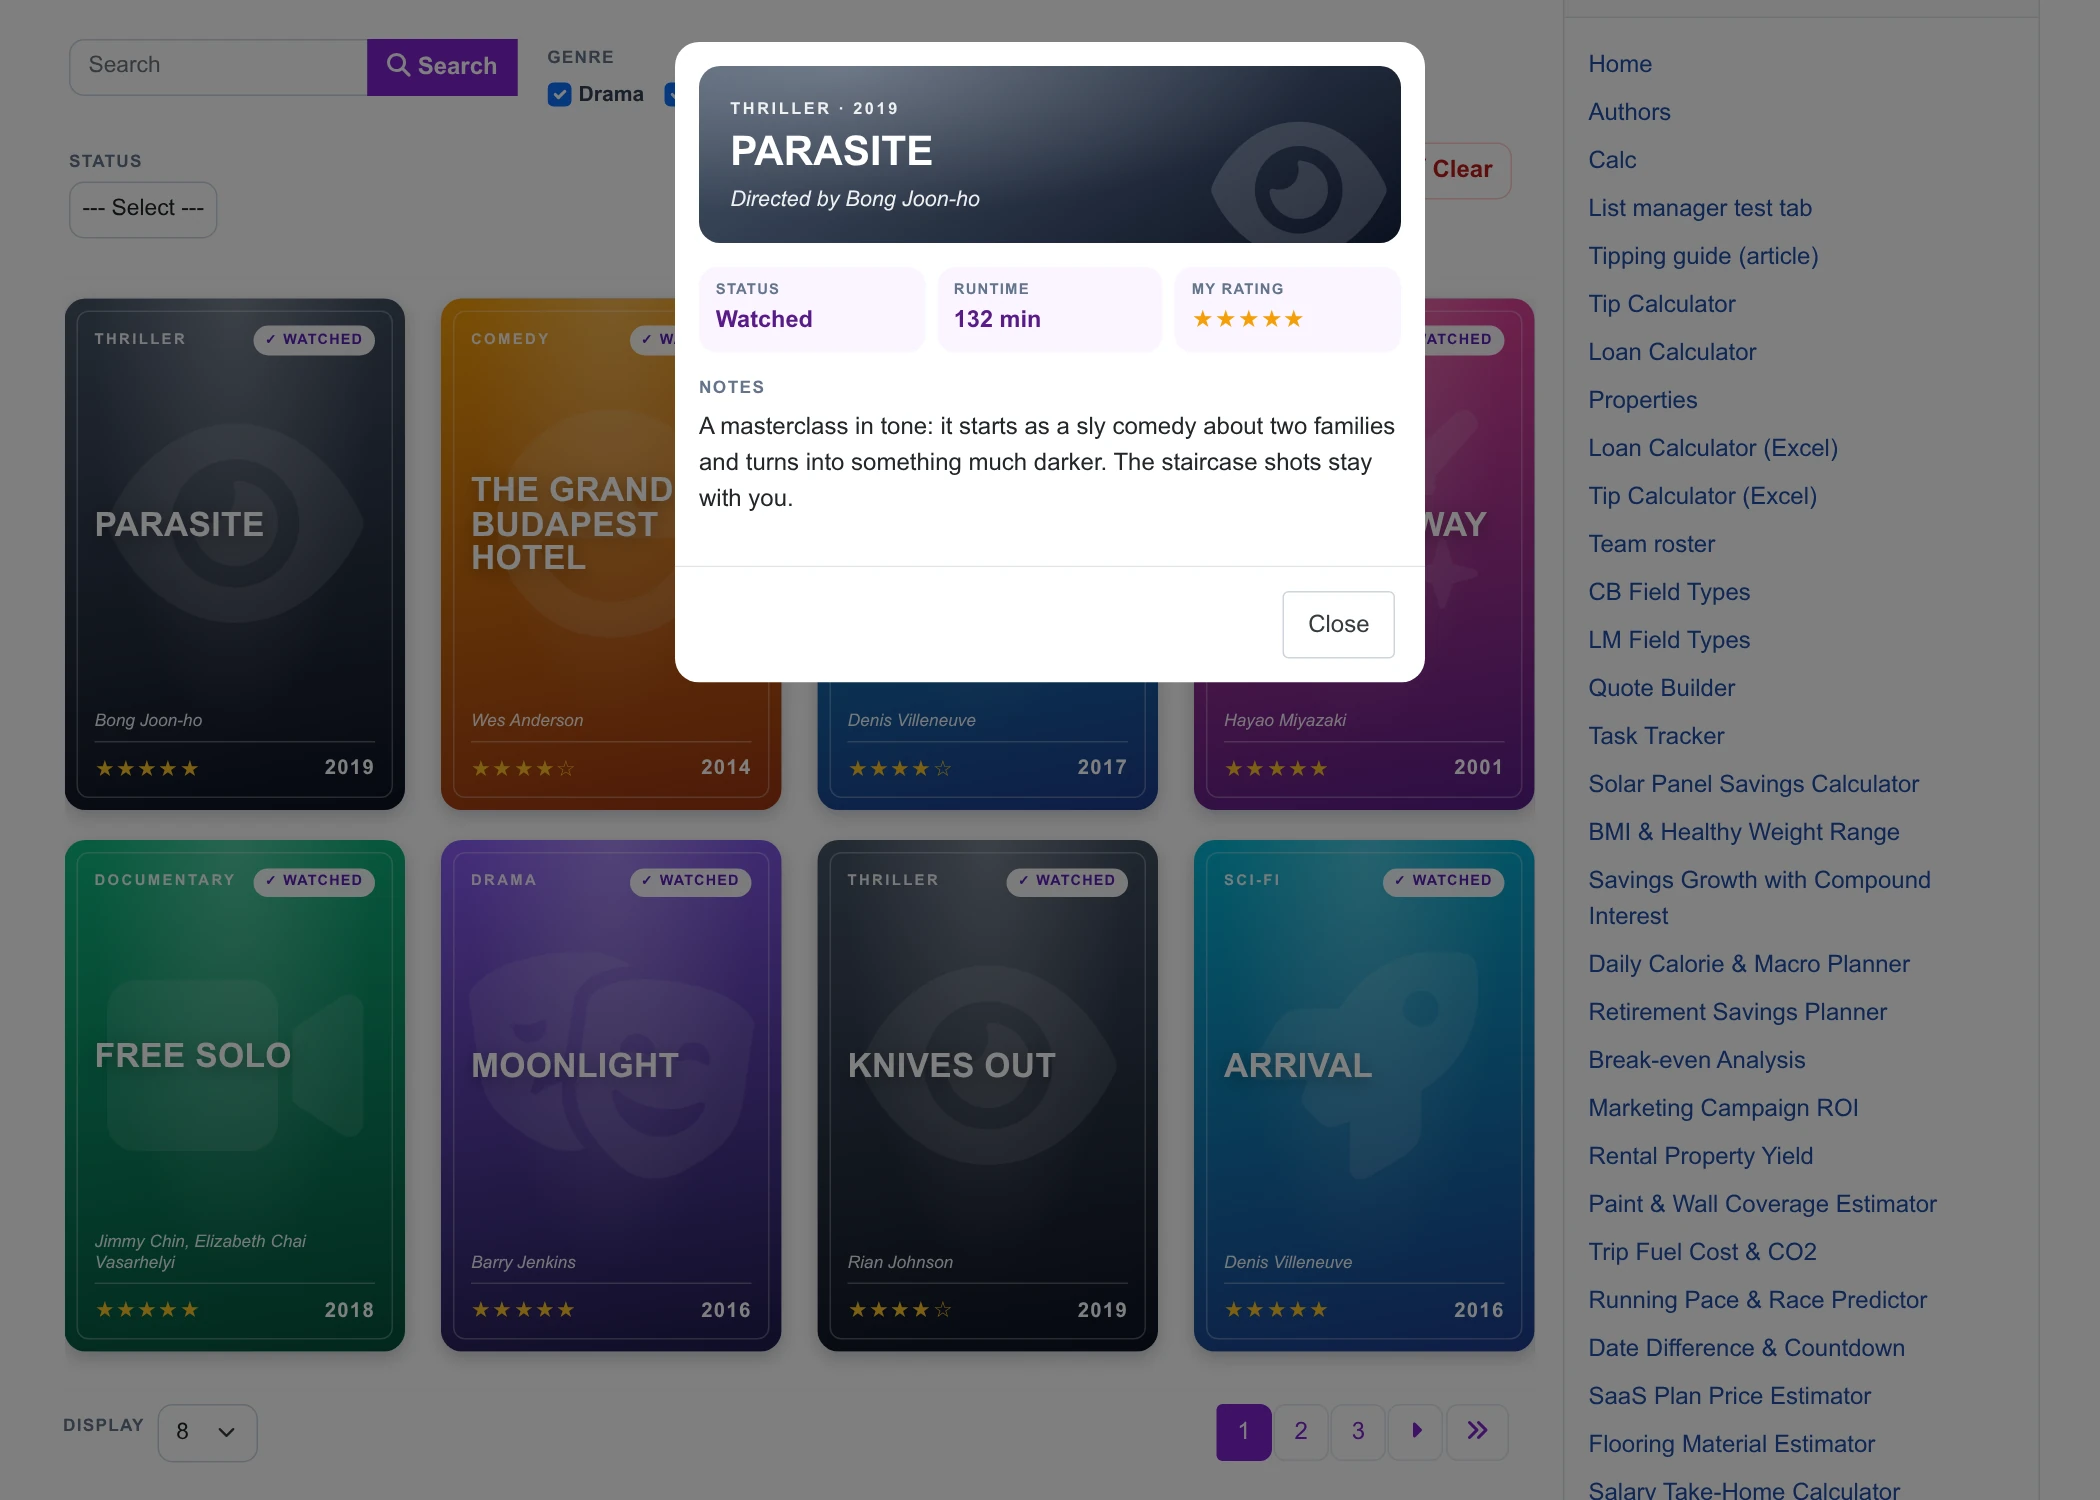
The detail pop-up that opens when a poster is clicked.
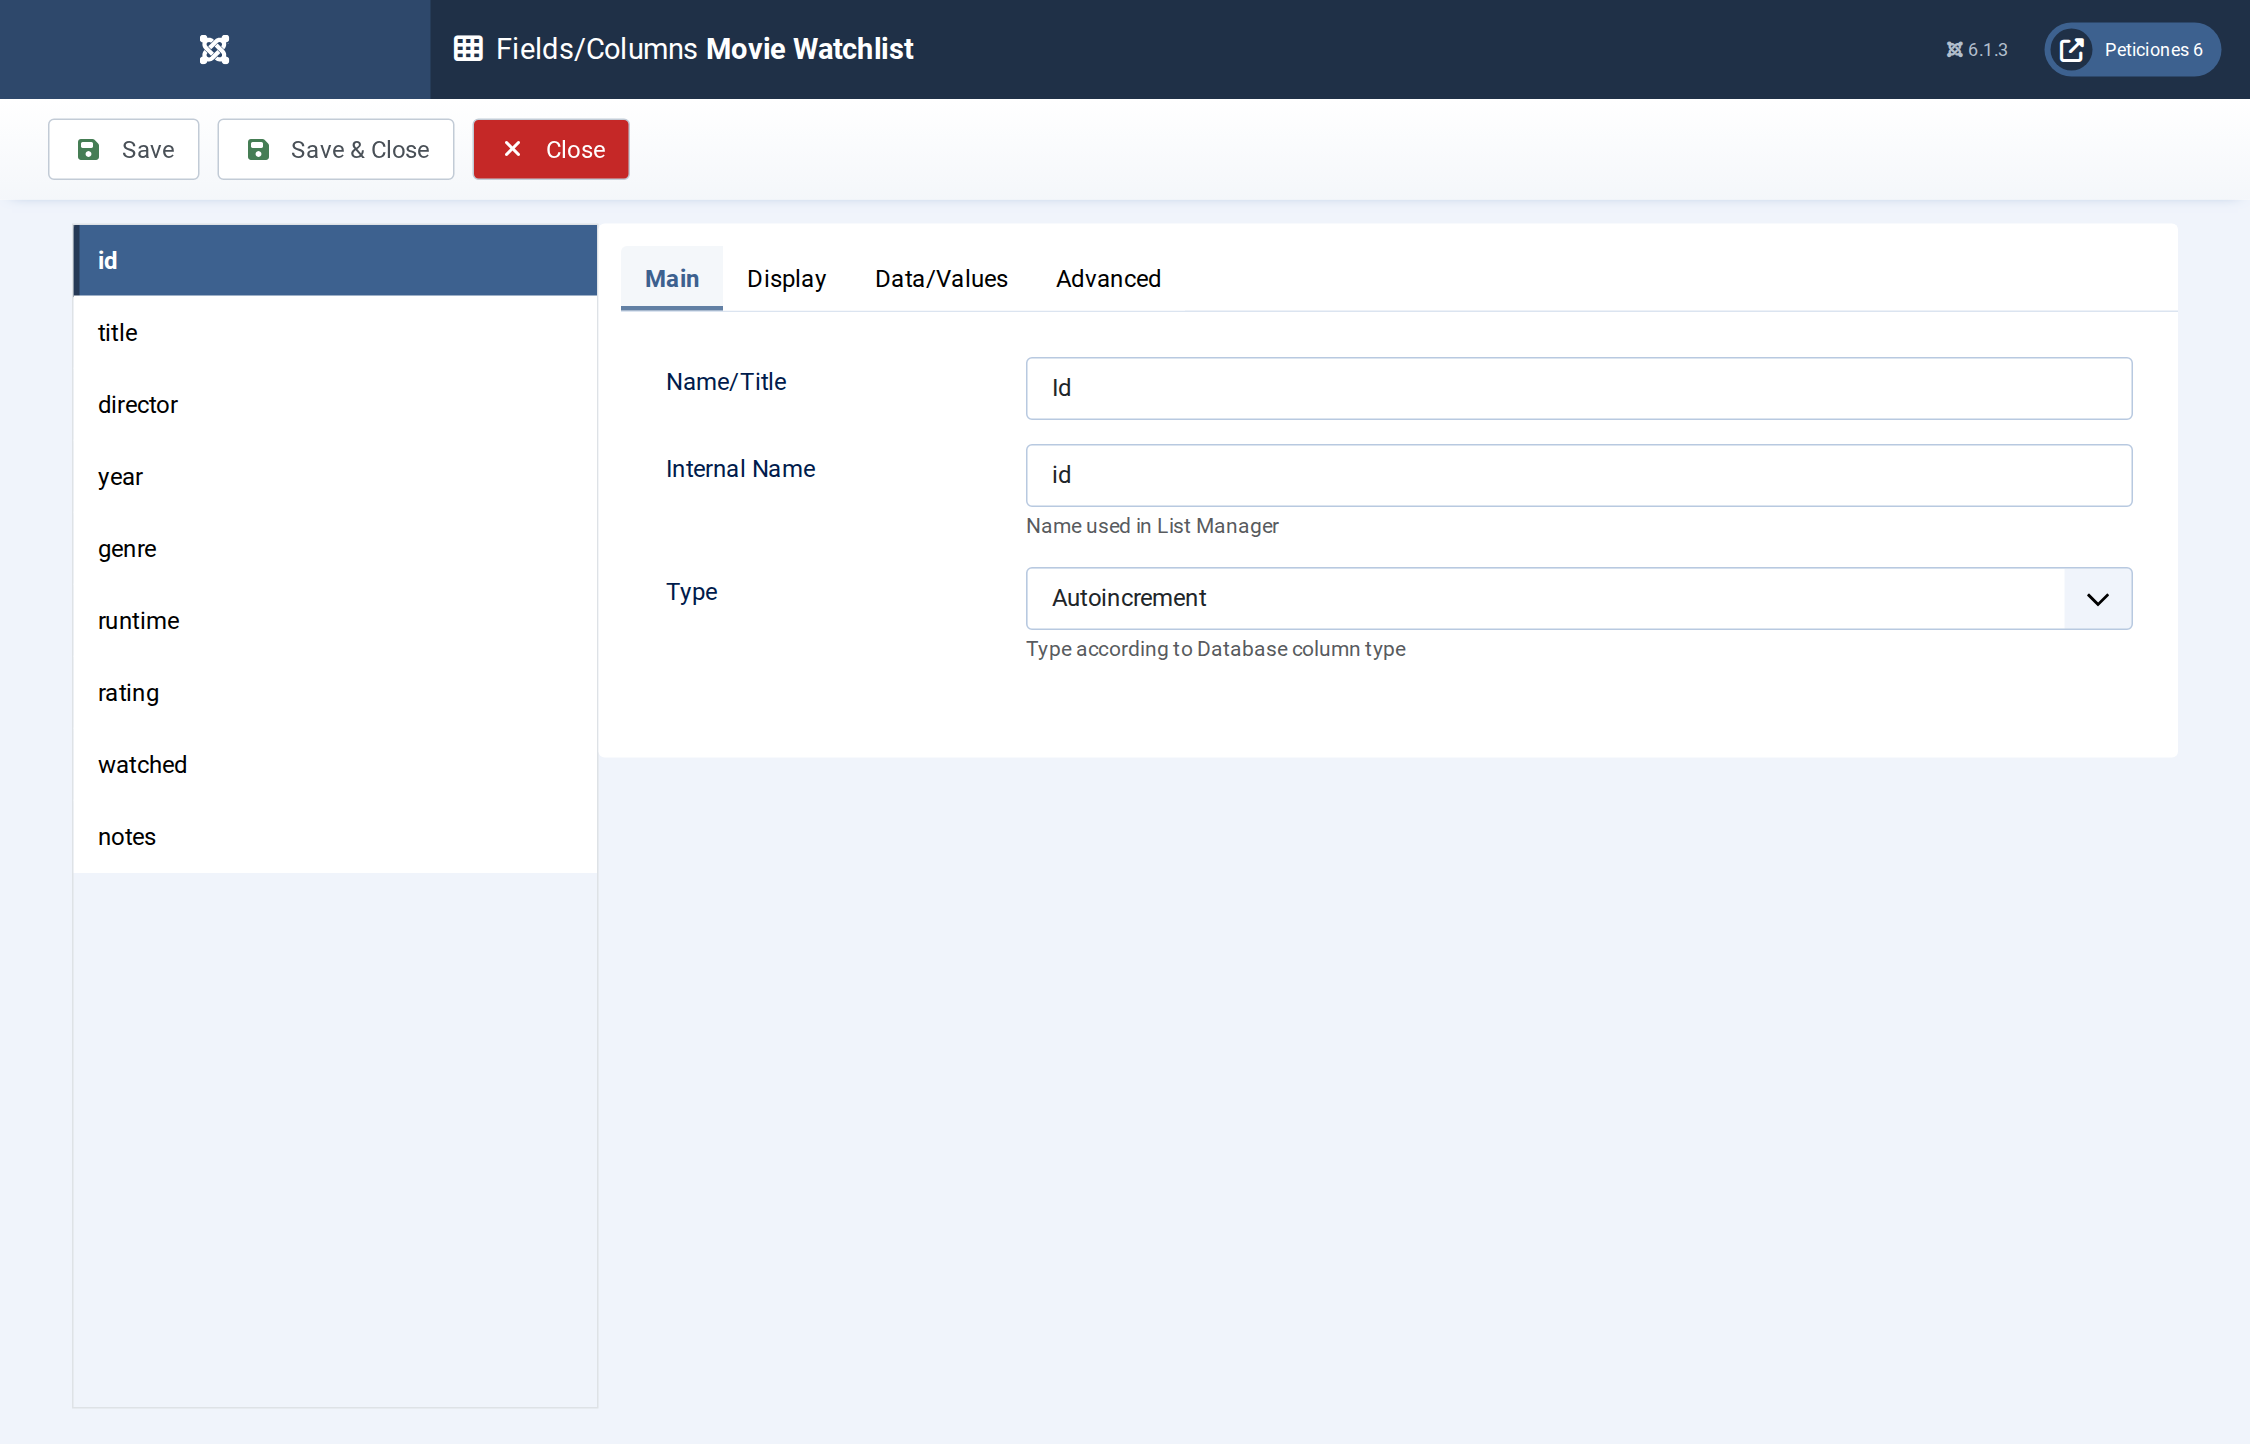
Fields/Columns: the columns with their types (text, option lists, numbers, textarea).
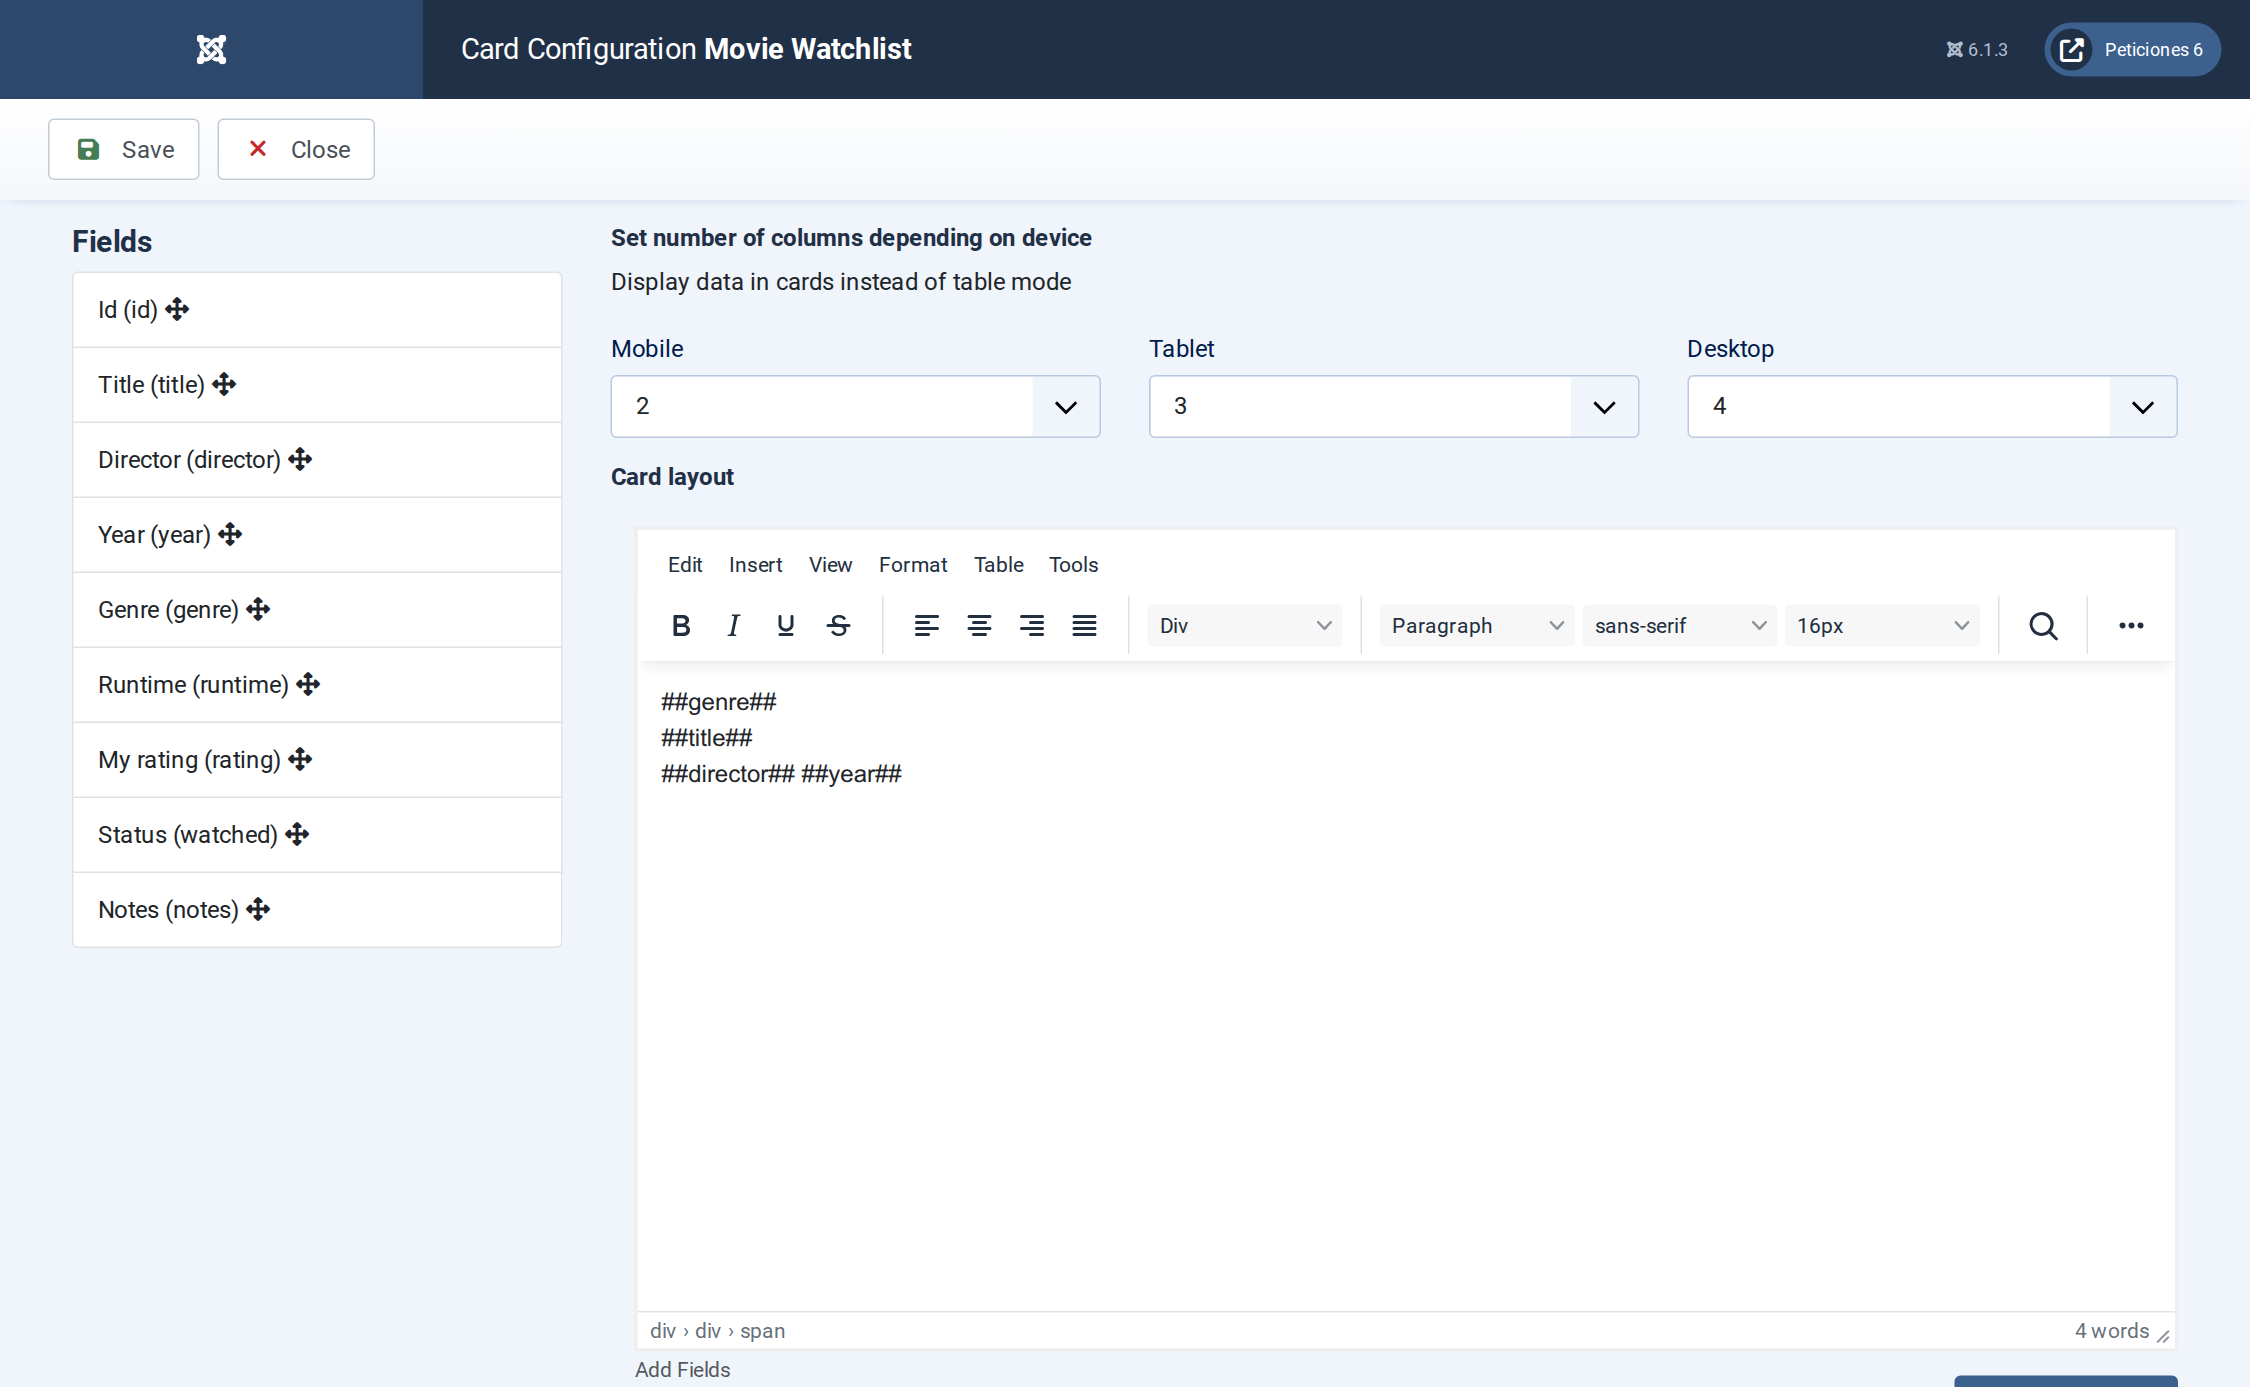
Display › Card: number of columns per device and the poster HTML with its placeholders.
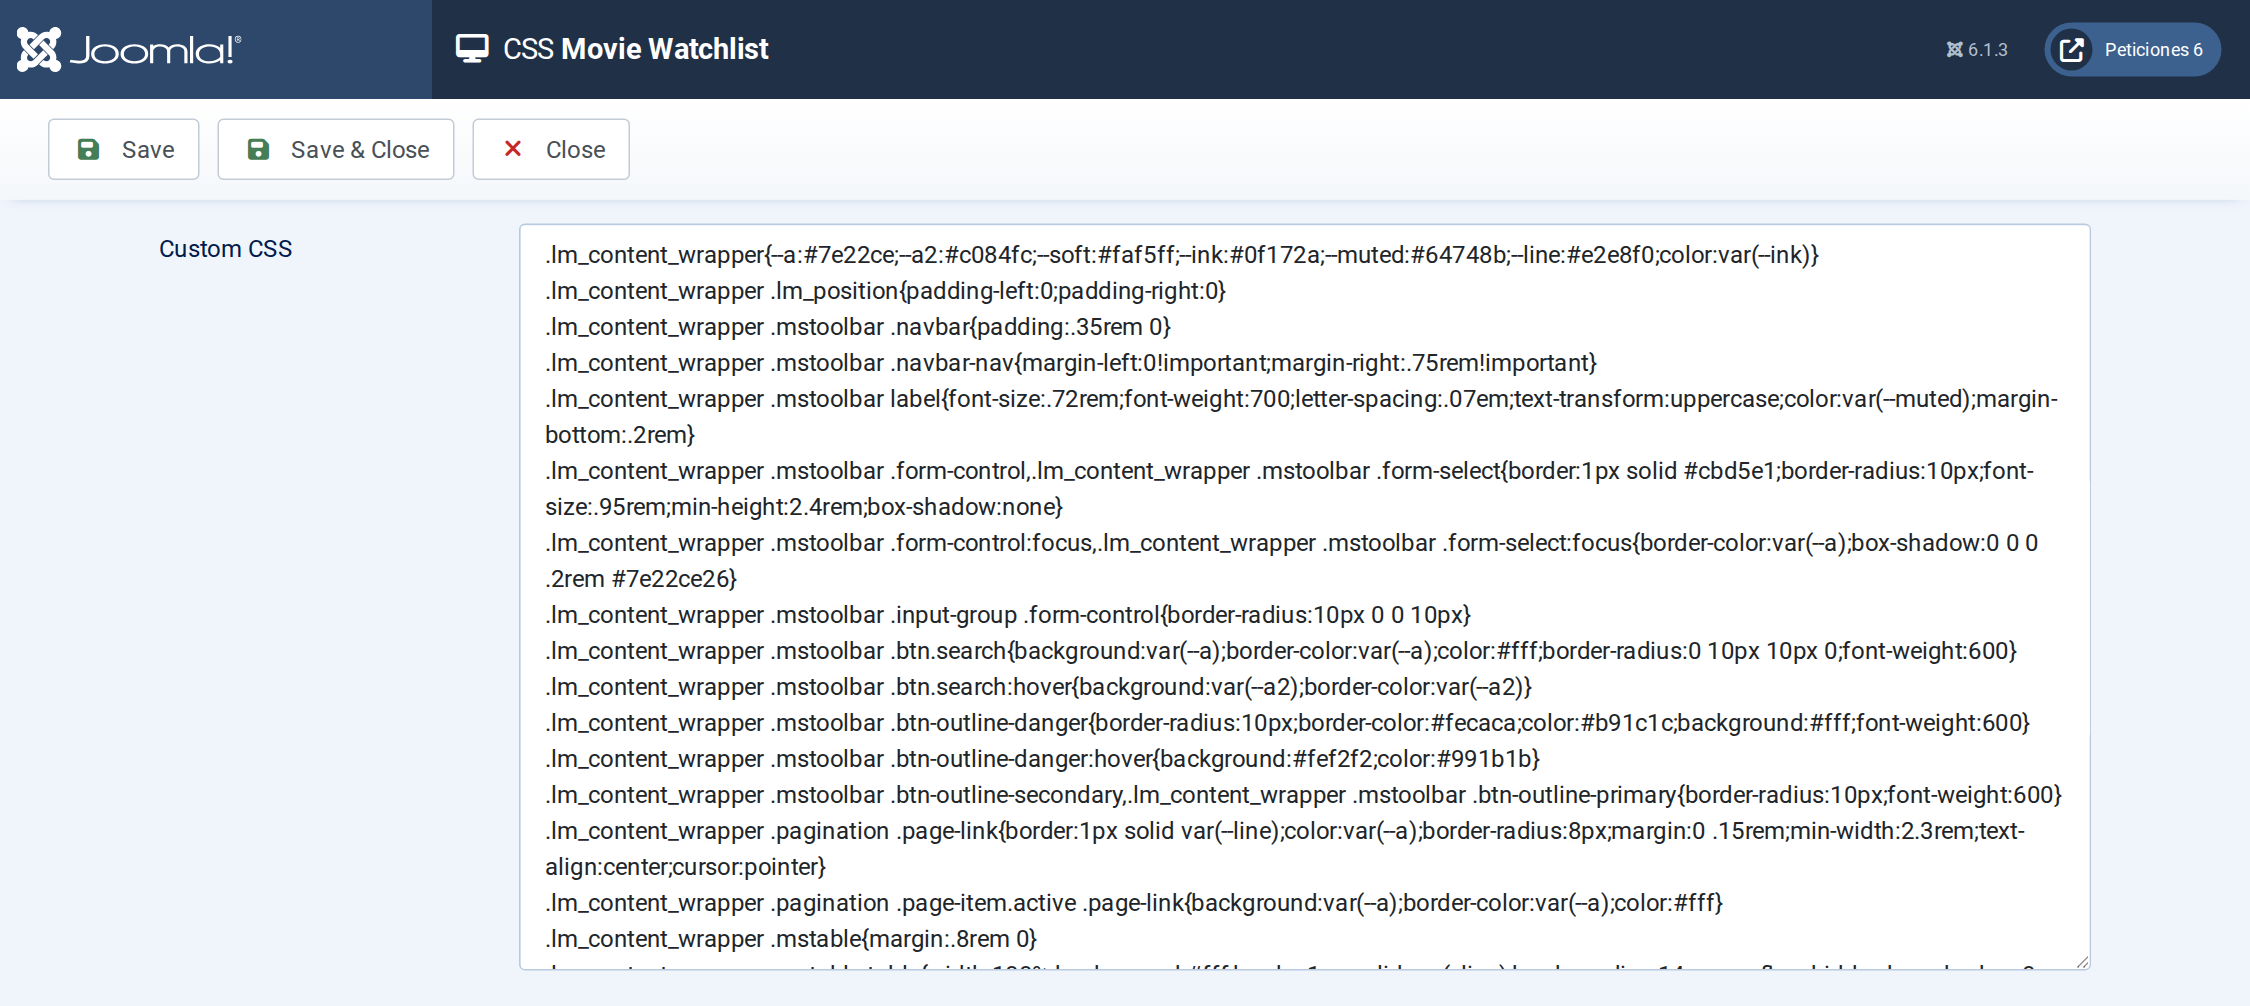
The CSS screen holds the whole design of the toolbar, pagination, posters and detail pop-up.
Want this exact example on your own site?
- Create the table. Run the SQL file in phpMyAdmin (or the mysql client) on your Joomla database. It creates the sample table with its data (the table name has no Joomla prefix and is replaced if it already exists).
- Import the configuration. In your Joomla admin open Components › List Manager › Import and upload the configuration file — it is the same file the component's own Export Configuration button produces.
- Publish it. Create a menu item of type List Manager and select the imported list.