
 List Manager example
Inventory Stock Levels
September 21, 2026

Live result on the frontend
The Inventory Stock Levels list shows thirty SKUs spread over three warehouses. It is the kind of list a purchasing team keeps open: what is on the shelf, what it is worth, and which items are at or below their reorder level.
What it shows
The visitor can check stock and take the data away:
- Totals row — the On hand and Value columns have the Total option, so the table ends with a totals row for the filtered list.
- Reorder badges — the Reorder? column is a Yes/No field; List Manager prints a tick or a cross and the CSS turns those icons into amber “Yes” / grey “No” badges.
- Search and filters — one search box over SKU, item and supplier (the supplier column is searchable although the table hides it) and drop-down filters for warehouse, category and reorder status.
- Excel and PDF export — two toolbar buttons download the list as an .xlsx or a PDF file, with the current search and filters applied.
- Detail pop-up — clicking a row opens the item card with stock, reorder level, unit cost, stock value, supplier and last count date.
How it’s built
The list uses the Table layout with eleven columns. The stock value is stored in the table (on hand × unit cost), so the totals row and the sorting work on real numbers. Money columns get their currency sign from CSS, and column widths are set with td.<column> and th[data-id=<column>] selectors in the CSS screen.
The toolbar is the standard one plus the export.excel and export.pdf buttons. On phones each row is turned into a small card by the CSS.
The database is the table lm_inventory with 30 sample rows (see the SQL download); the list configuration is a single XML file created with the Export Configuration button.
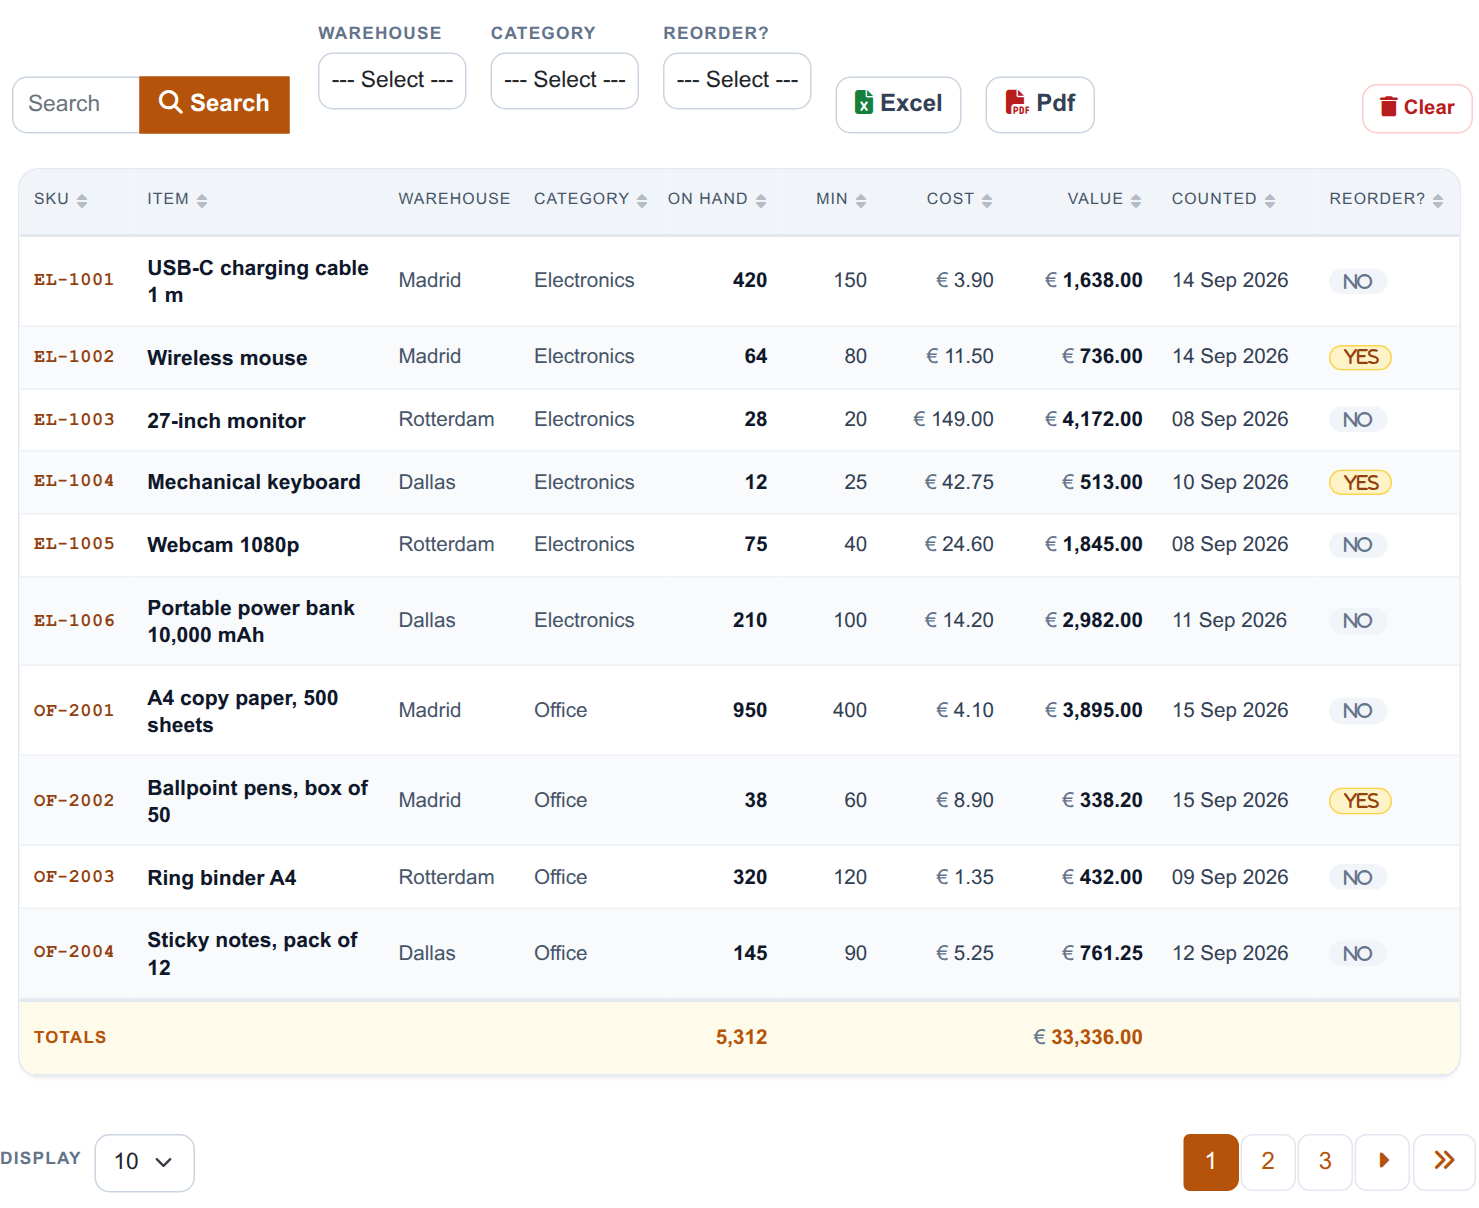
The whole list on the frontend: search, filters, Excel and PDF buttons, the stock table and its totals row.
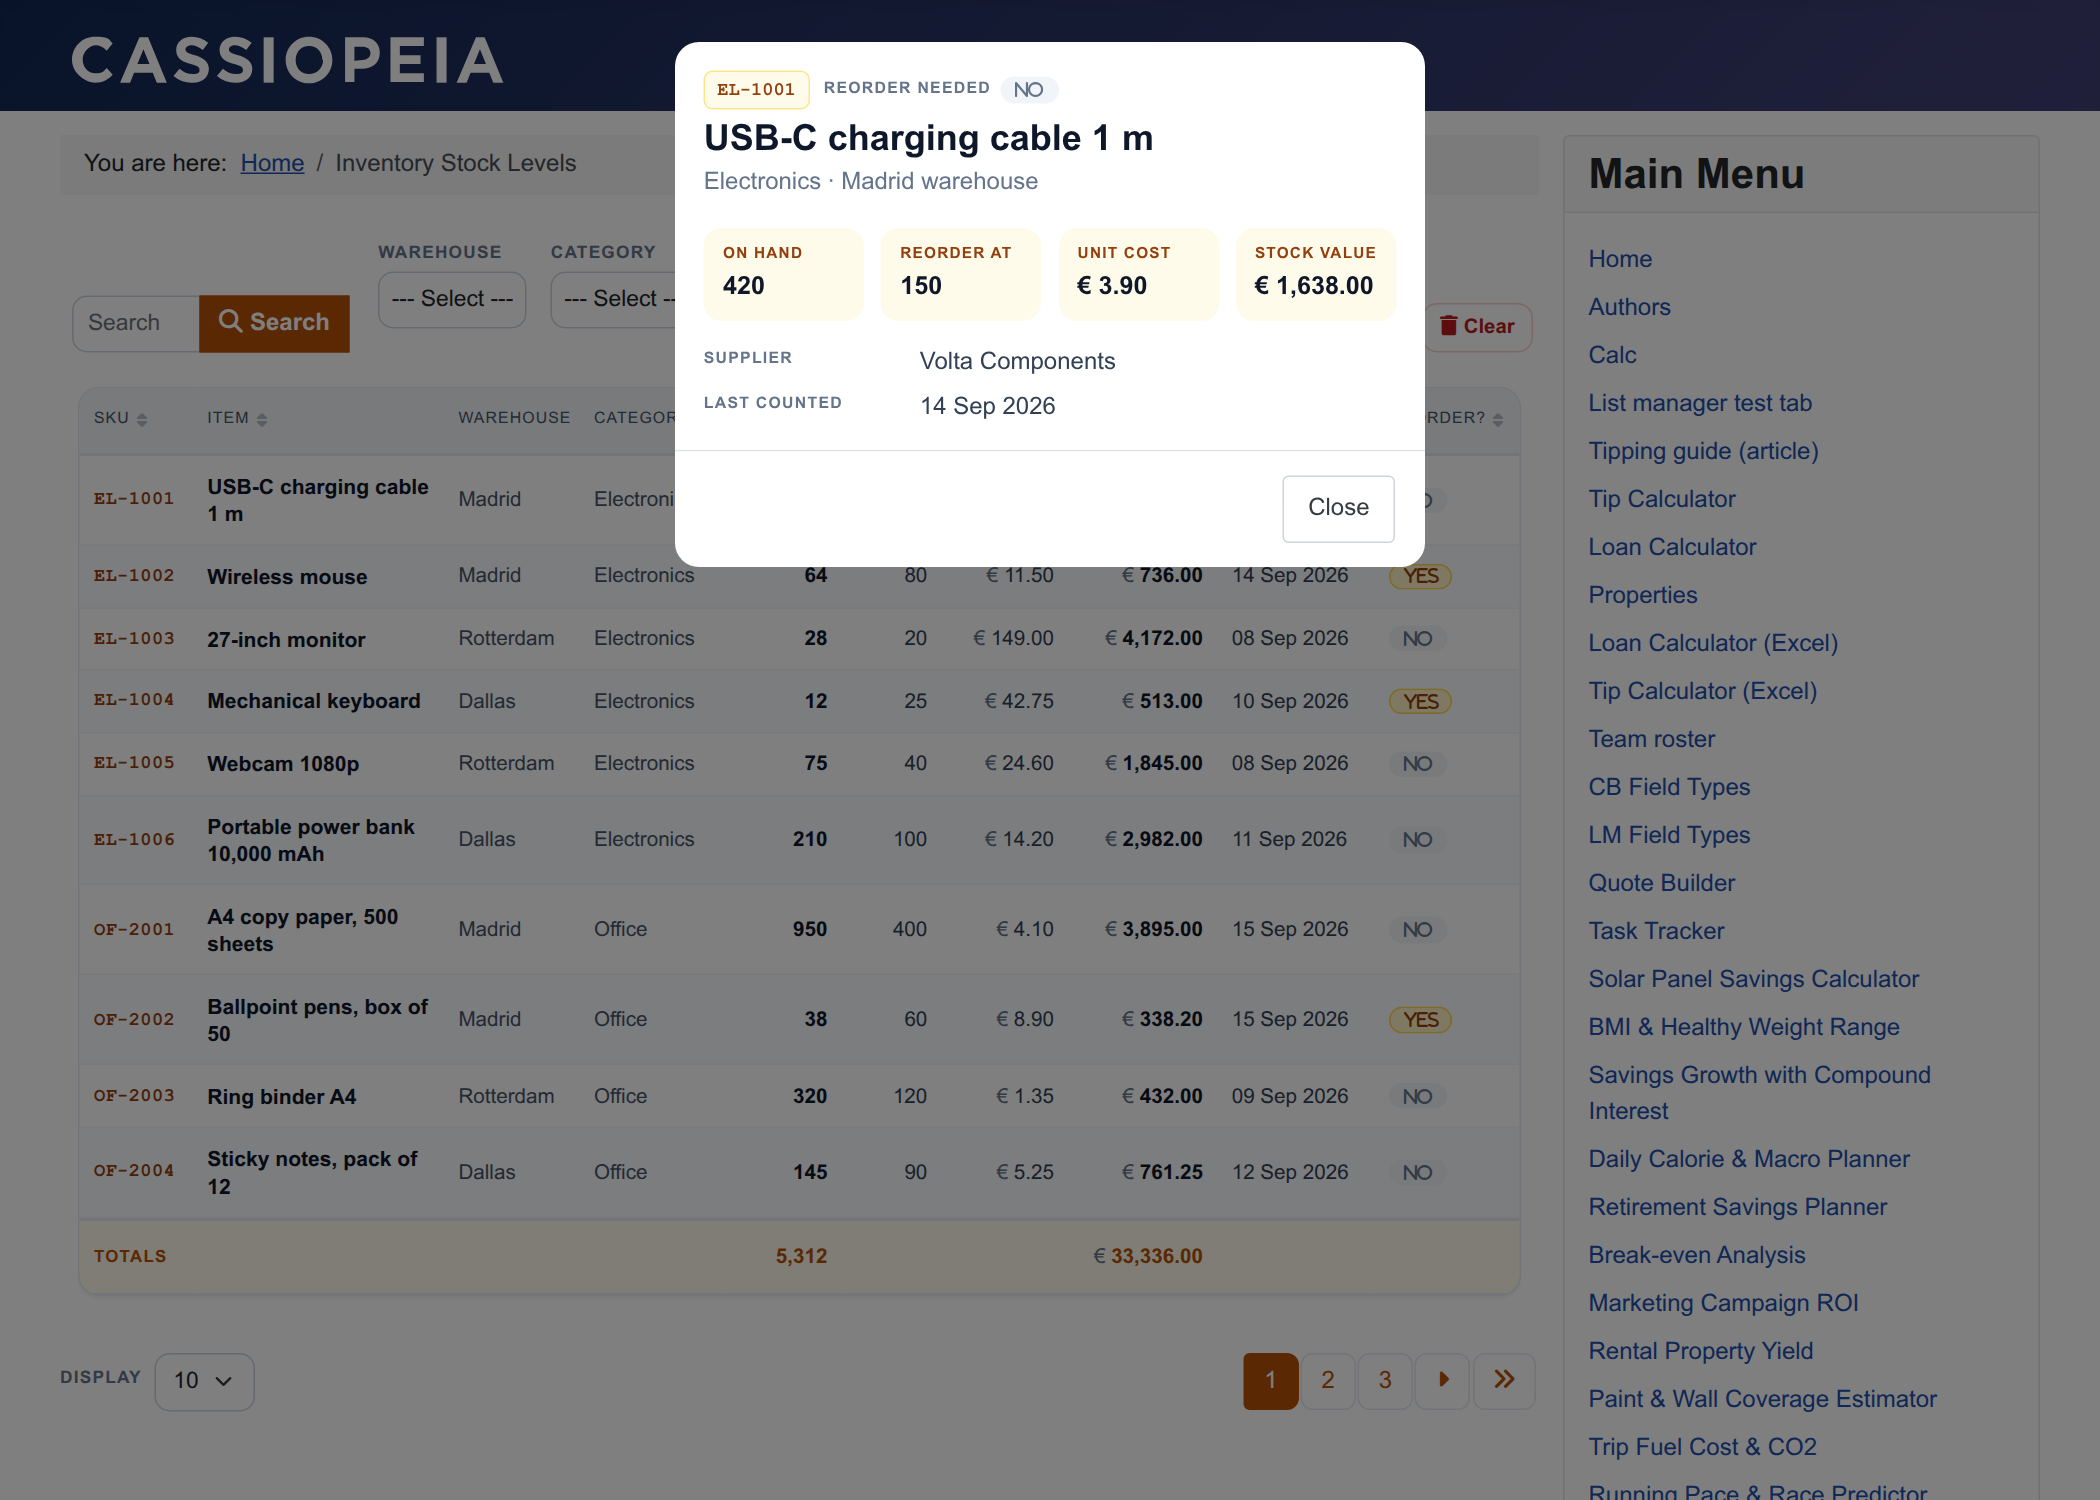
The detail pop-up with the item card.
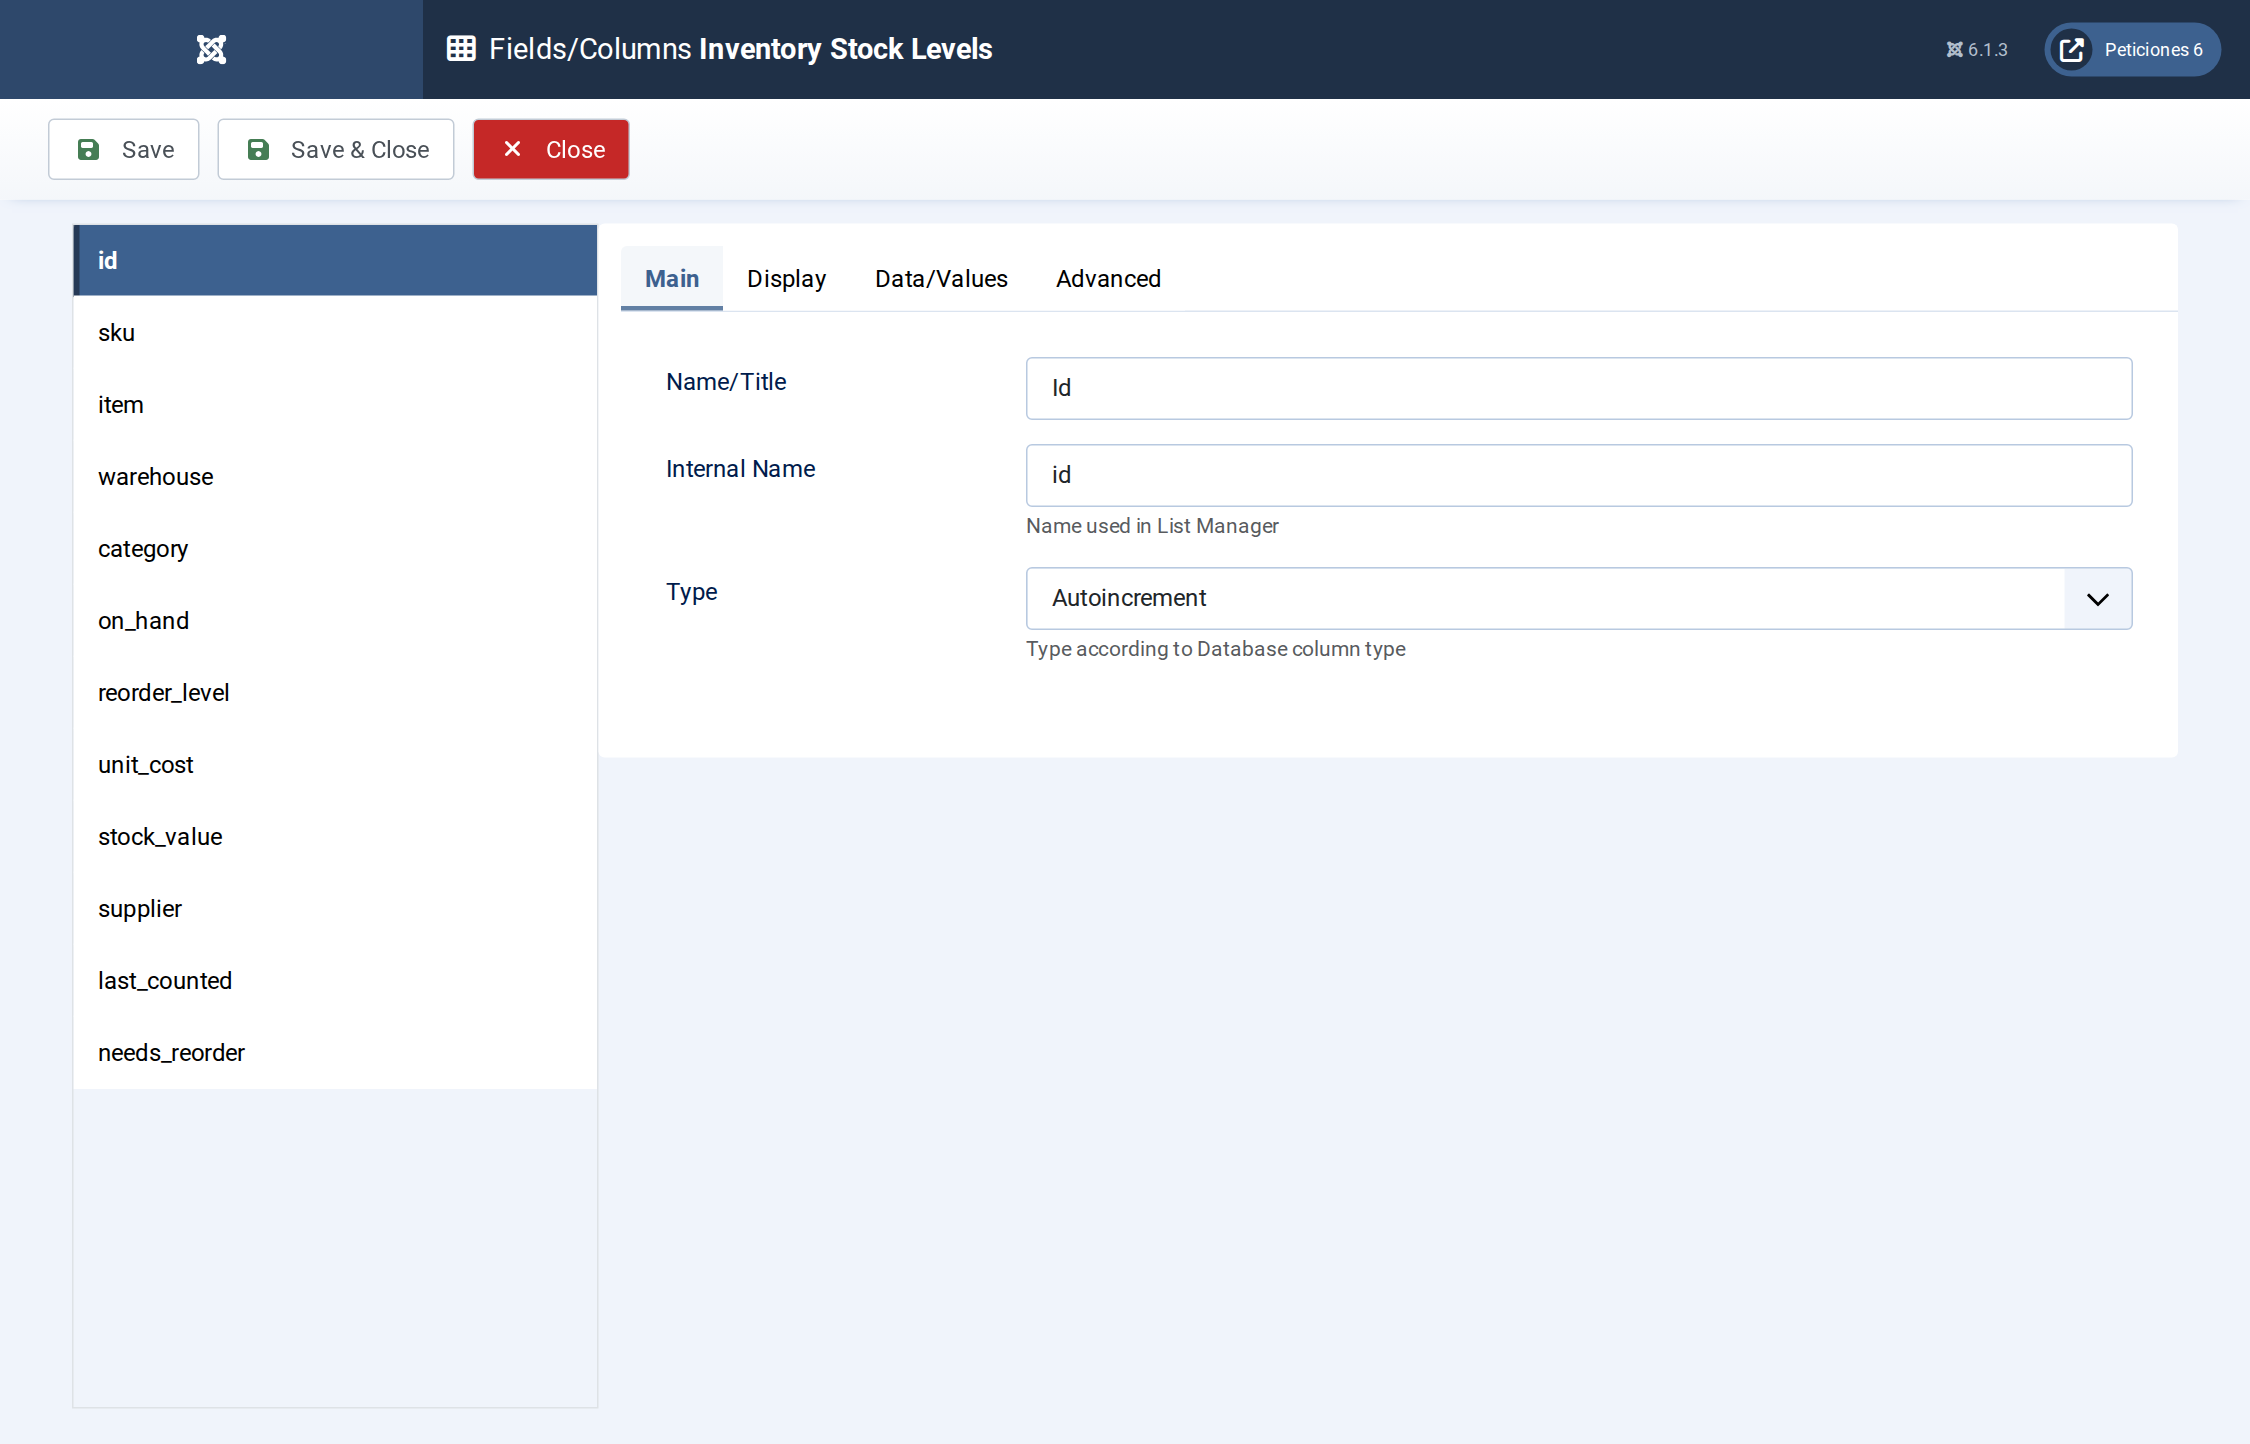
Fields/Columns: the SKU, text, option list, number (with totals), date and Yes/No columns.
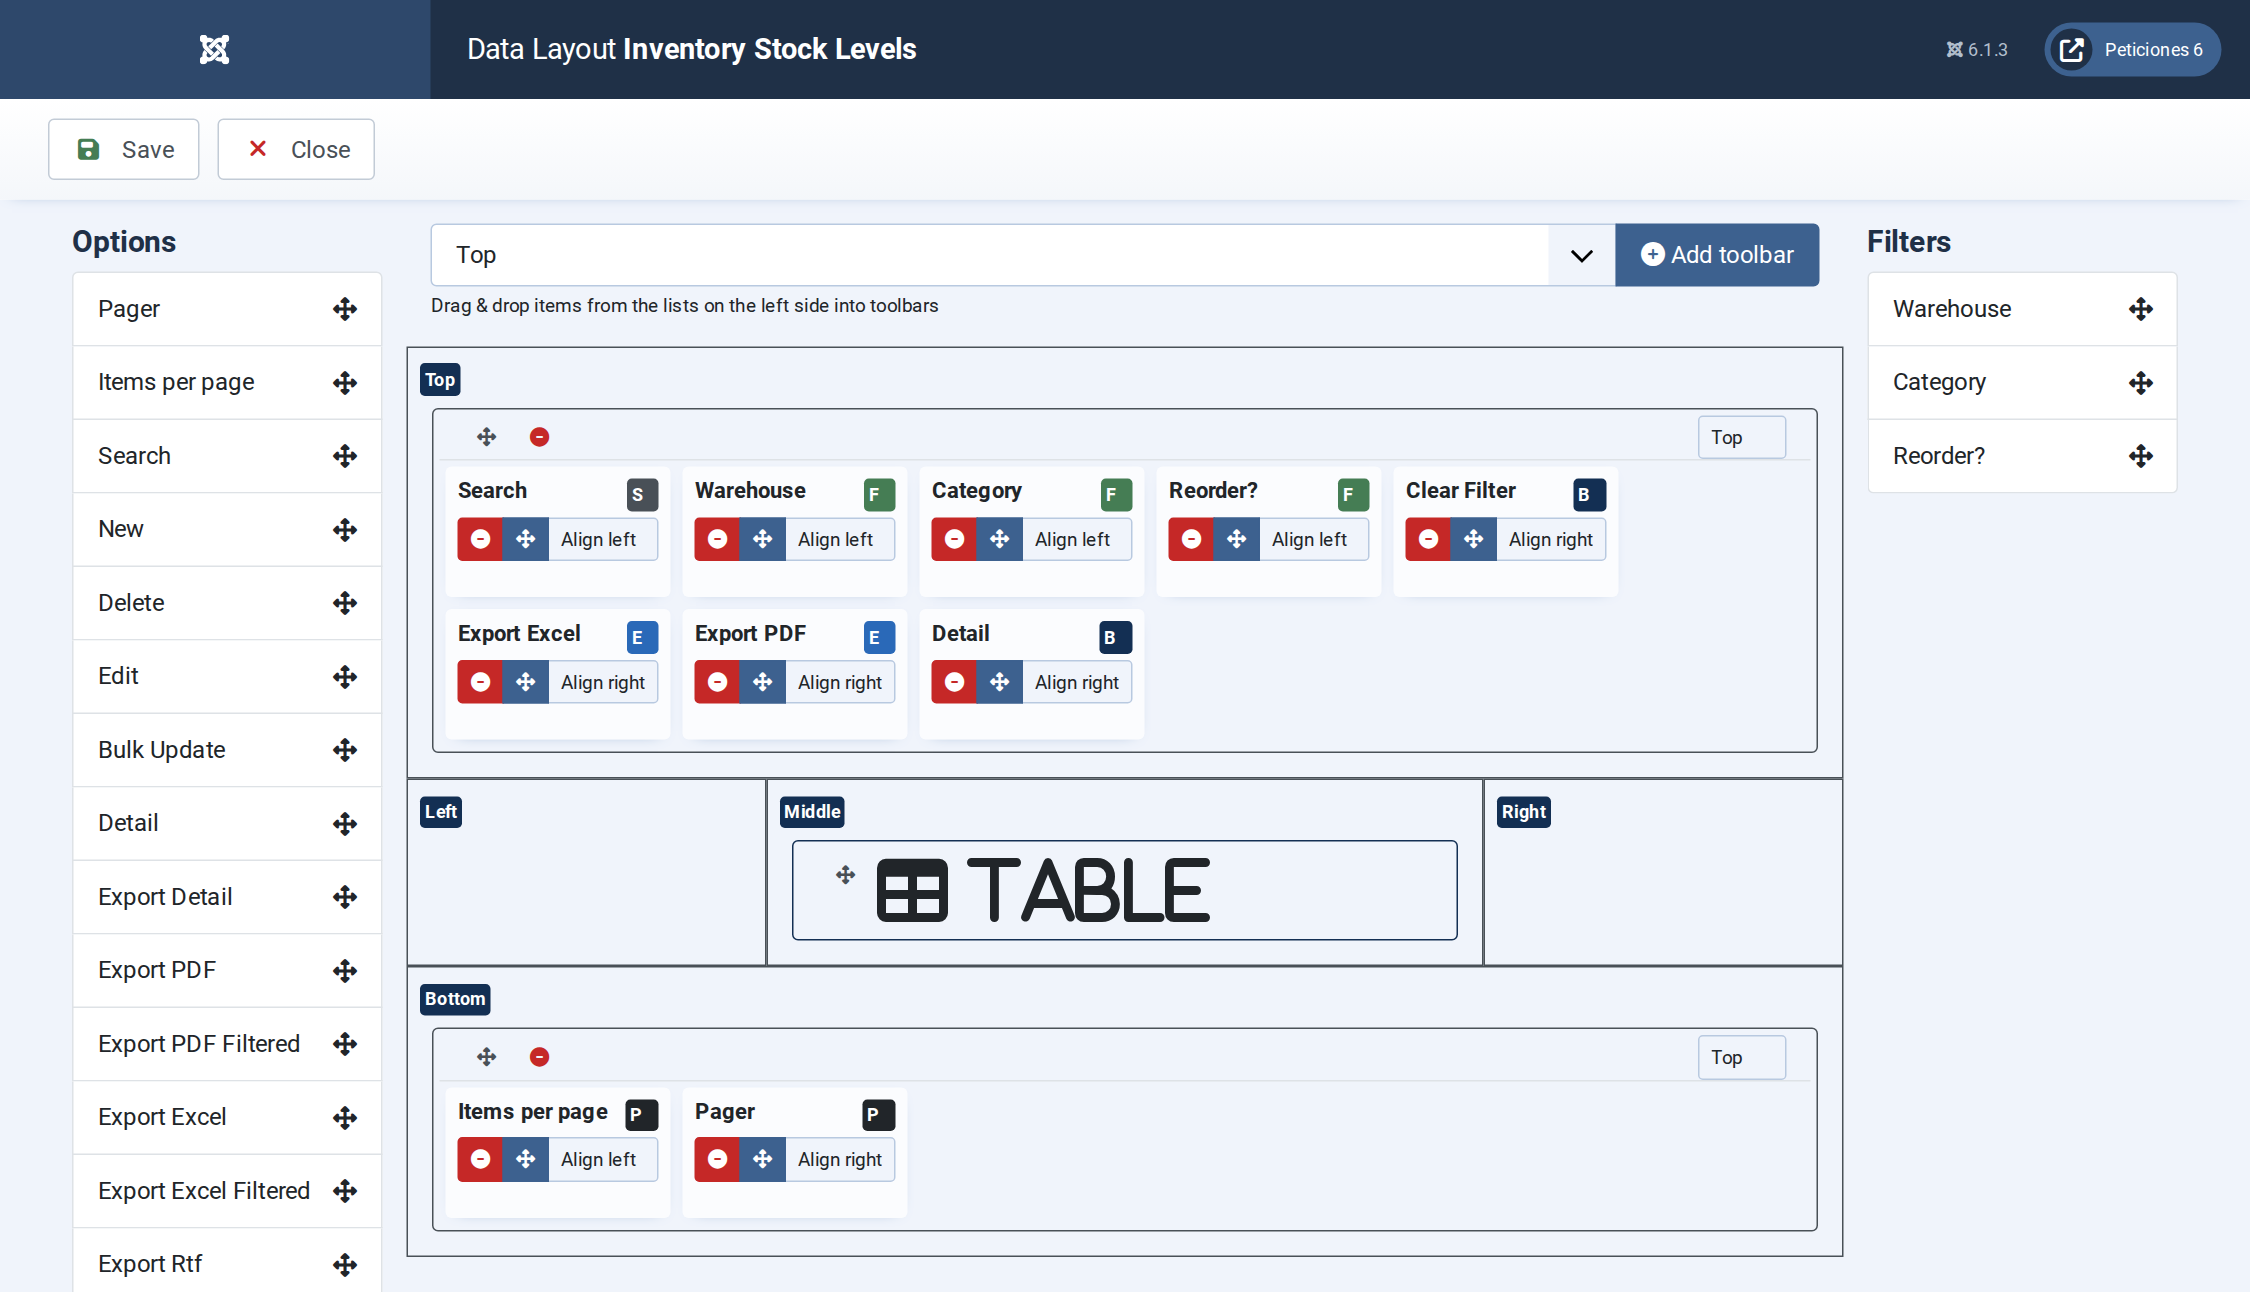
Display › Data Layout: table layout, date and number formats and pagination defaults.
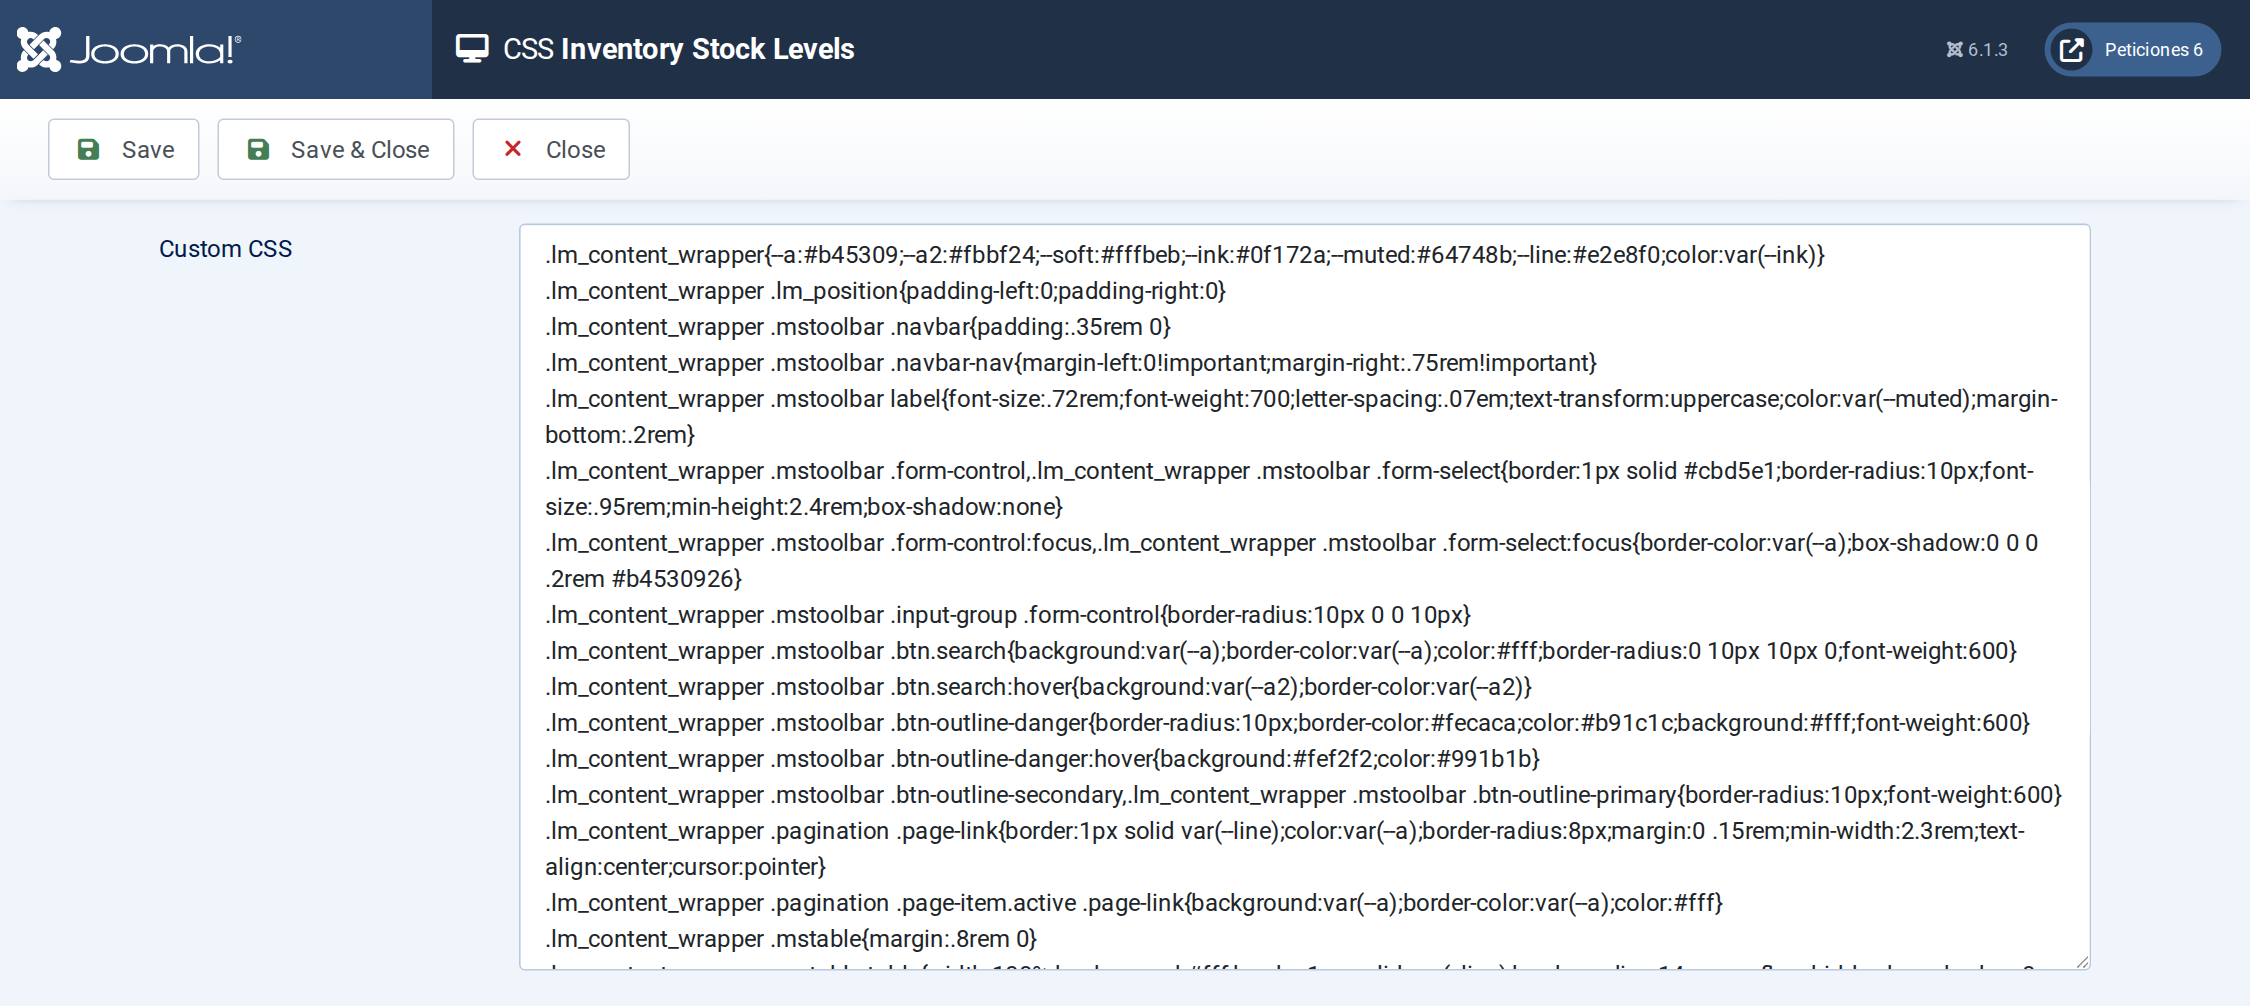
The CSS screen holds the column widths, the reorder badges, the totals row and the phone layout.
Want this exact example on your own site?
- Create the table. Run the SQL file in phpMyAdmin (or the mysql client) on your Joomla database. It creates the sample table with its data (the table name has no Joomla prefix and is replaced if it already exists).
- Import the configuration. In your Joomla admin open Components › List Manager › Import and upload the configuration file — it is the same file the component's own Export Configuration button produces.
- Publish it. Create a menu item of type List Manager and select the imported list.