
 List Manager example
Course Catalog
September 21, 2026

Live result on the frontend
The Course Catalog list shows 24 online courses as cards. The header colour and icon come from the category, a three-bar meter shows the level, and a tag shows either FREE or the price. A click opens the course with its numbered syllabus.
What it shows
A learner can find the right course quickly:
- Card layout — three columns on desktop, two on tablets and one on phones, with a category-coloured header and icon.
- Filters — category and level drop-downs, a price range filter and a search box over title, instructor, category and syllabus.
- Level meter and tags — the level (Beginner, Intermediate, Advanced) fills one, two or three bars using only CSS; free courses get a FREE tag.
- Detail pop-up — clicking a card shows price, level, duration, rating and the syllabus as a numbered list.
How it’s built
The list uses the Card layout with ##field## placeholders. The category and level labels are single words, so the card can use them as CSS classes (c-Data, lv-Advanced) that pick the header colour and the number of filled bars. The price is stored as a number for the range filter and as a text column (price_label, FREE or €49) for the tag.
The syllabus is stored as one text column with the modules separated by semicolons; a few lines in the list’s Javascript screen turn it into a numbered list inside the pop-up. The student count uses the list’s thousands separator.
The database is the table lm_courses with 24 sample rows (see the SQL download); the list configuration is a single XML file created with the Export Configuration button.
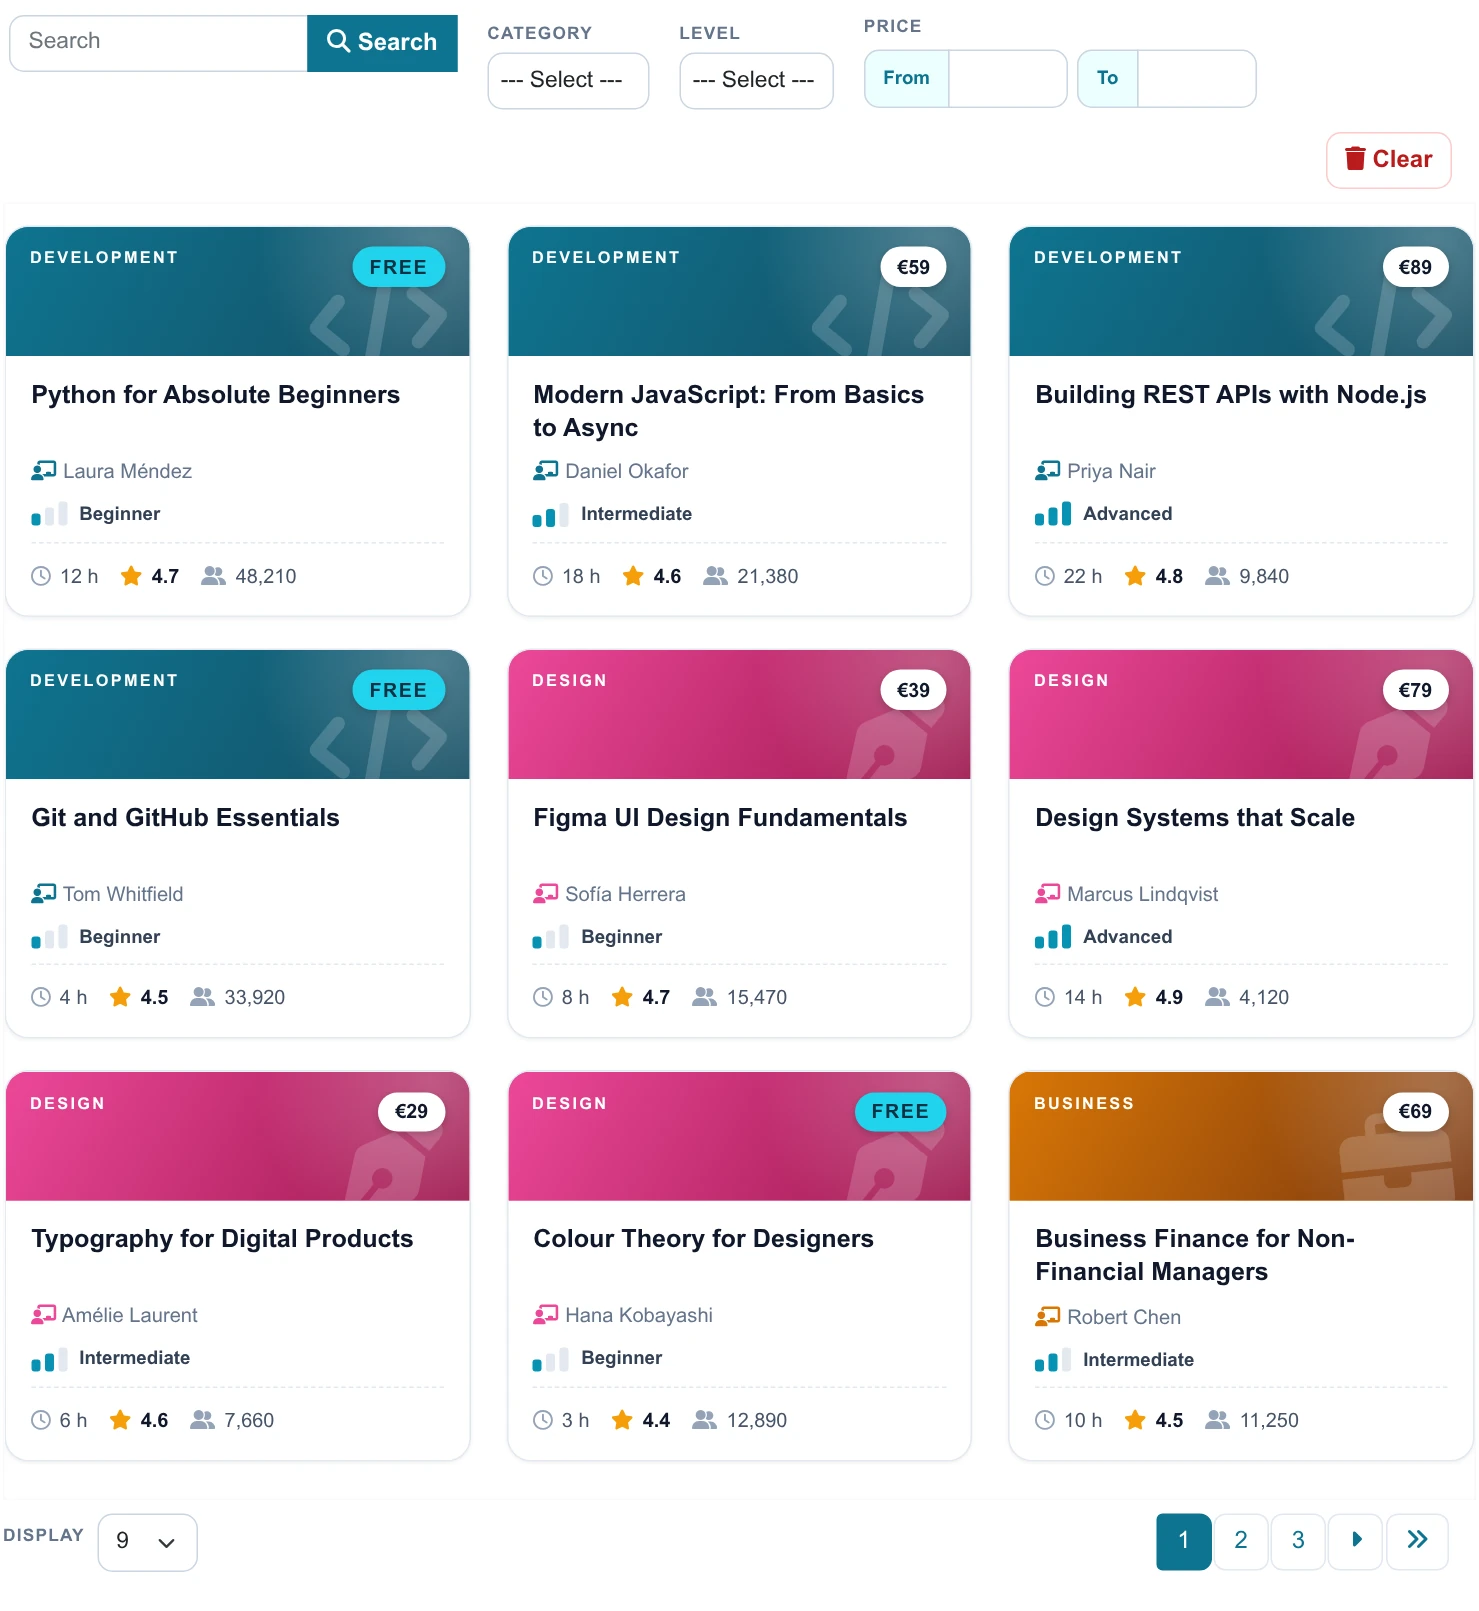
The whole list on the frontend: toolbar with search and filters, course cards and pagination.
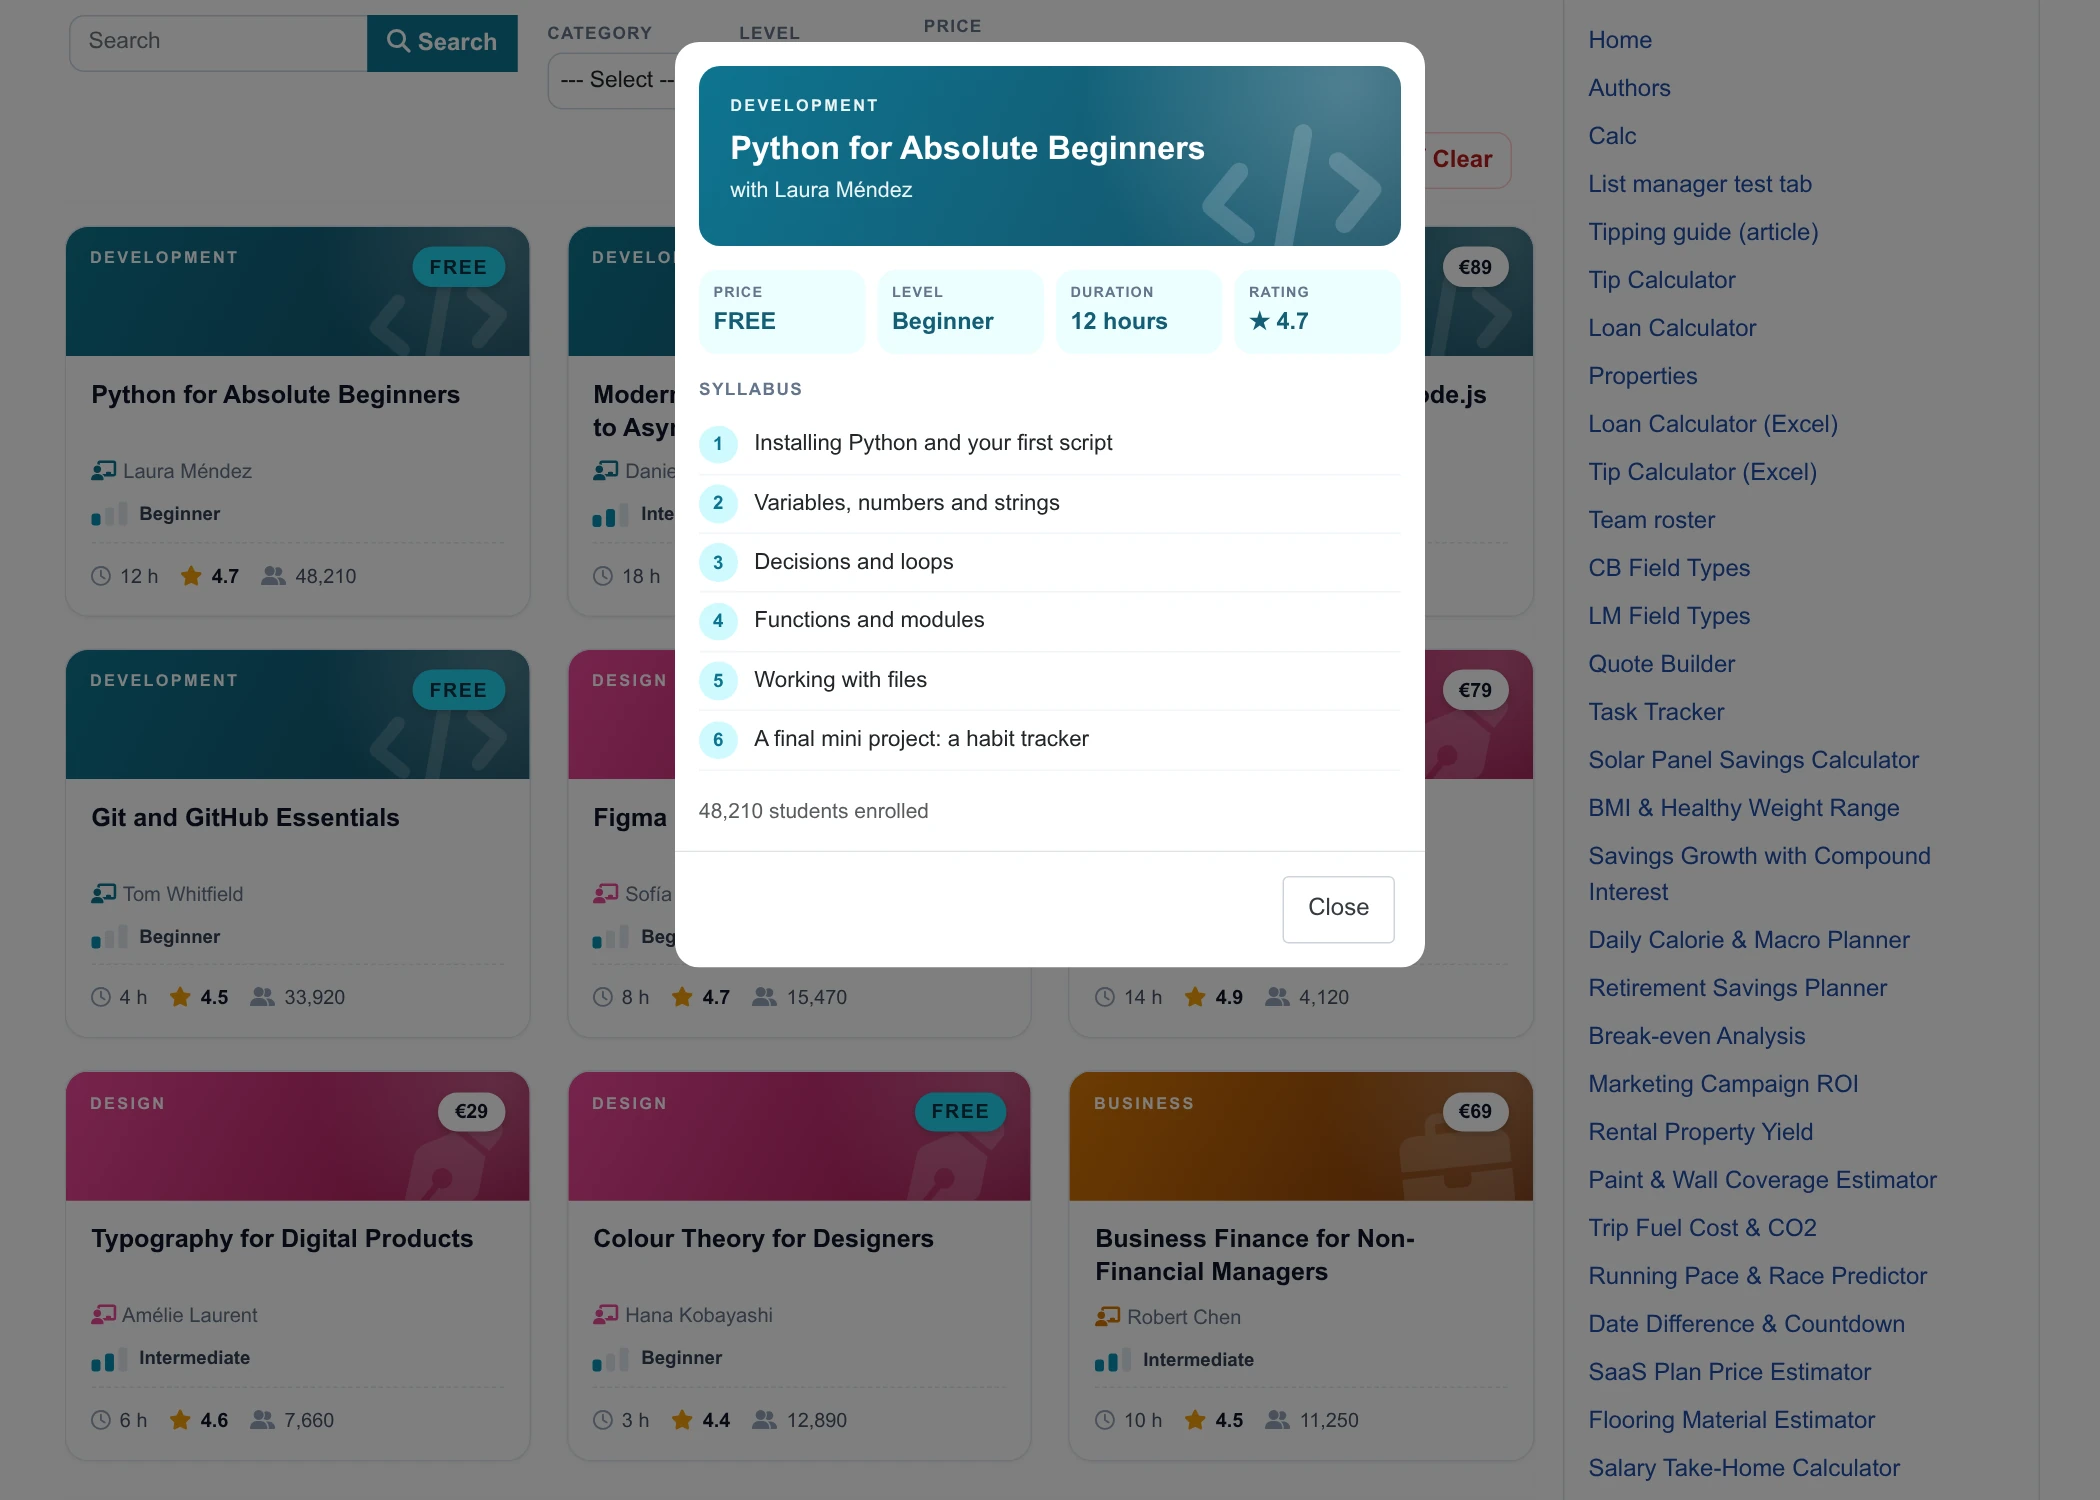
The detail pop-up that opens when a card is clicked.
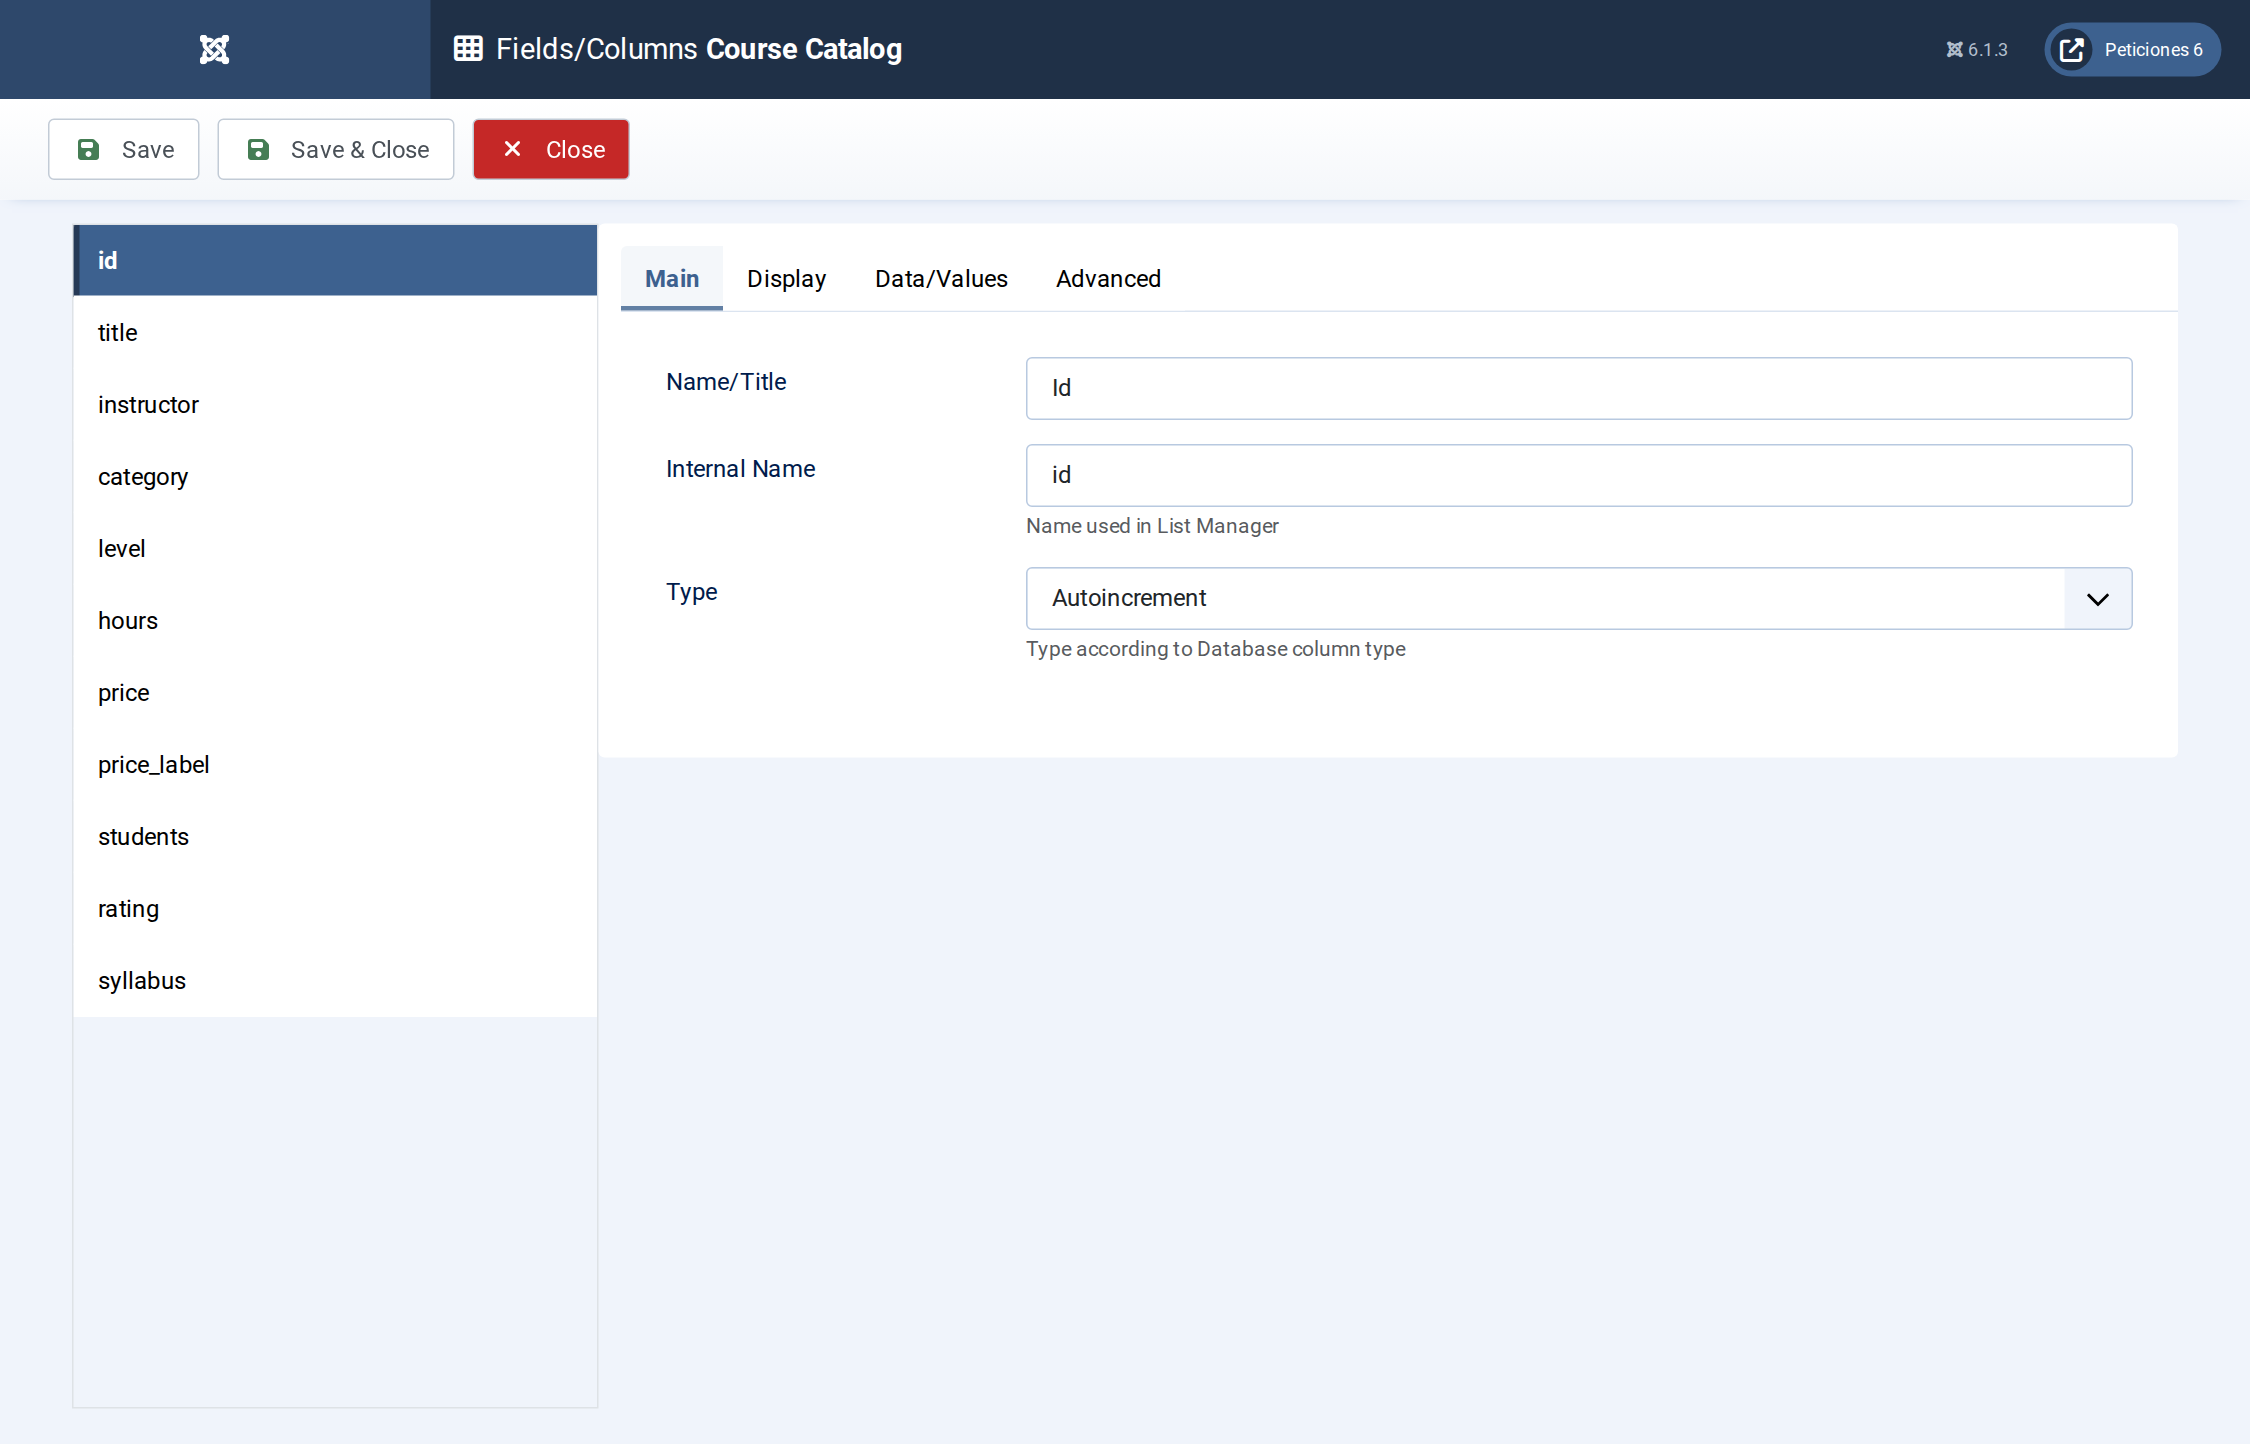
Fields/Columns: the columns with their types (text, option lists, numbers, textarea).
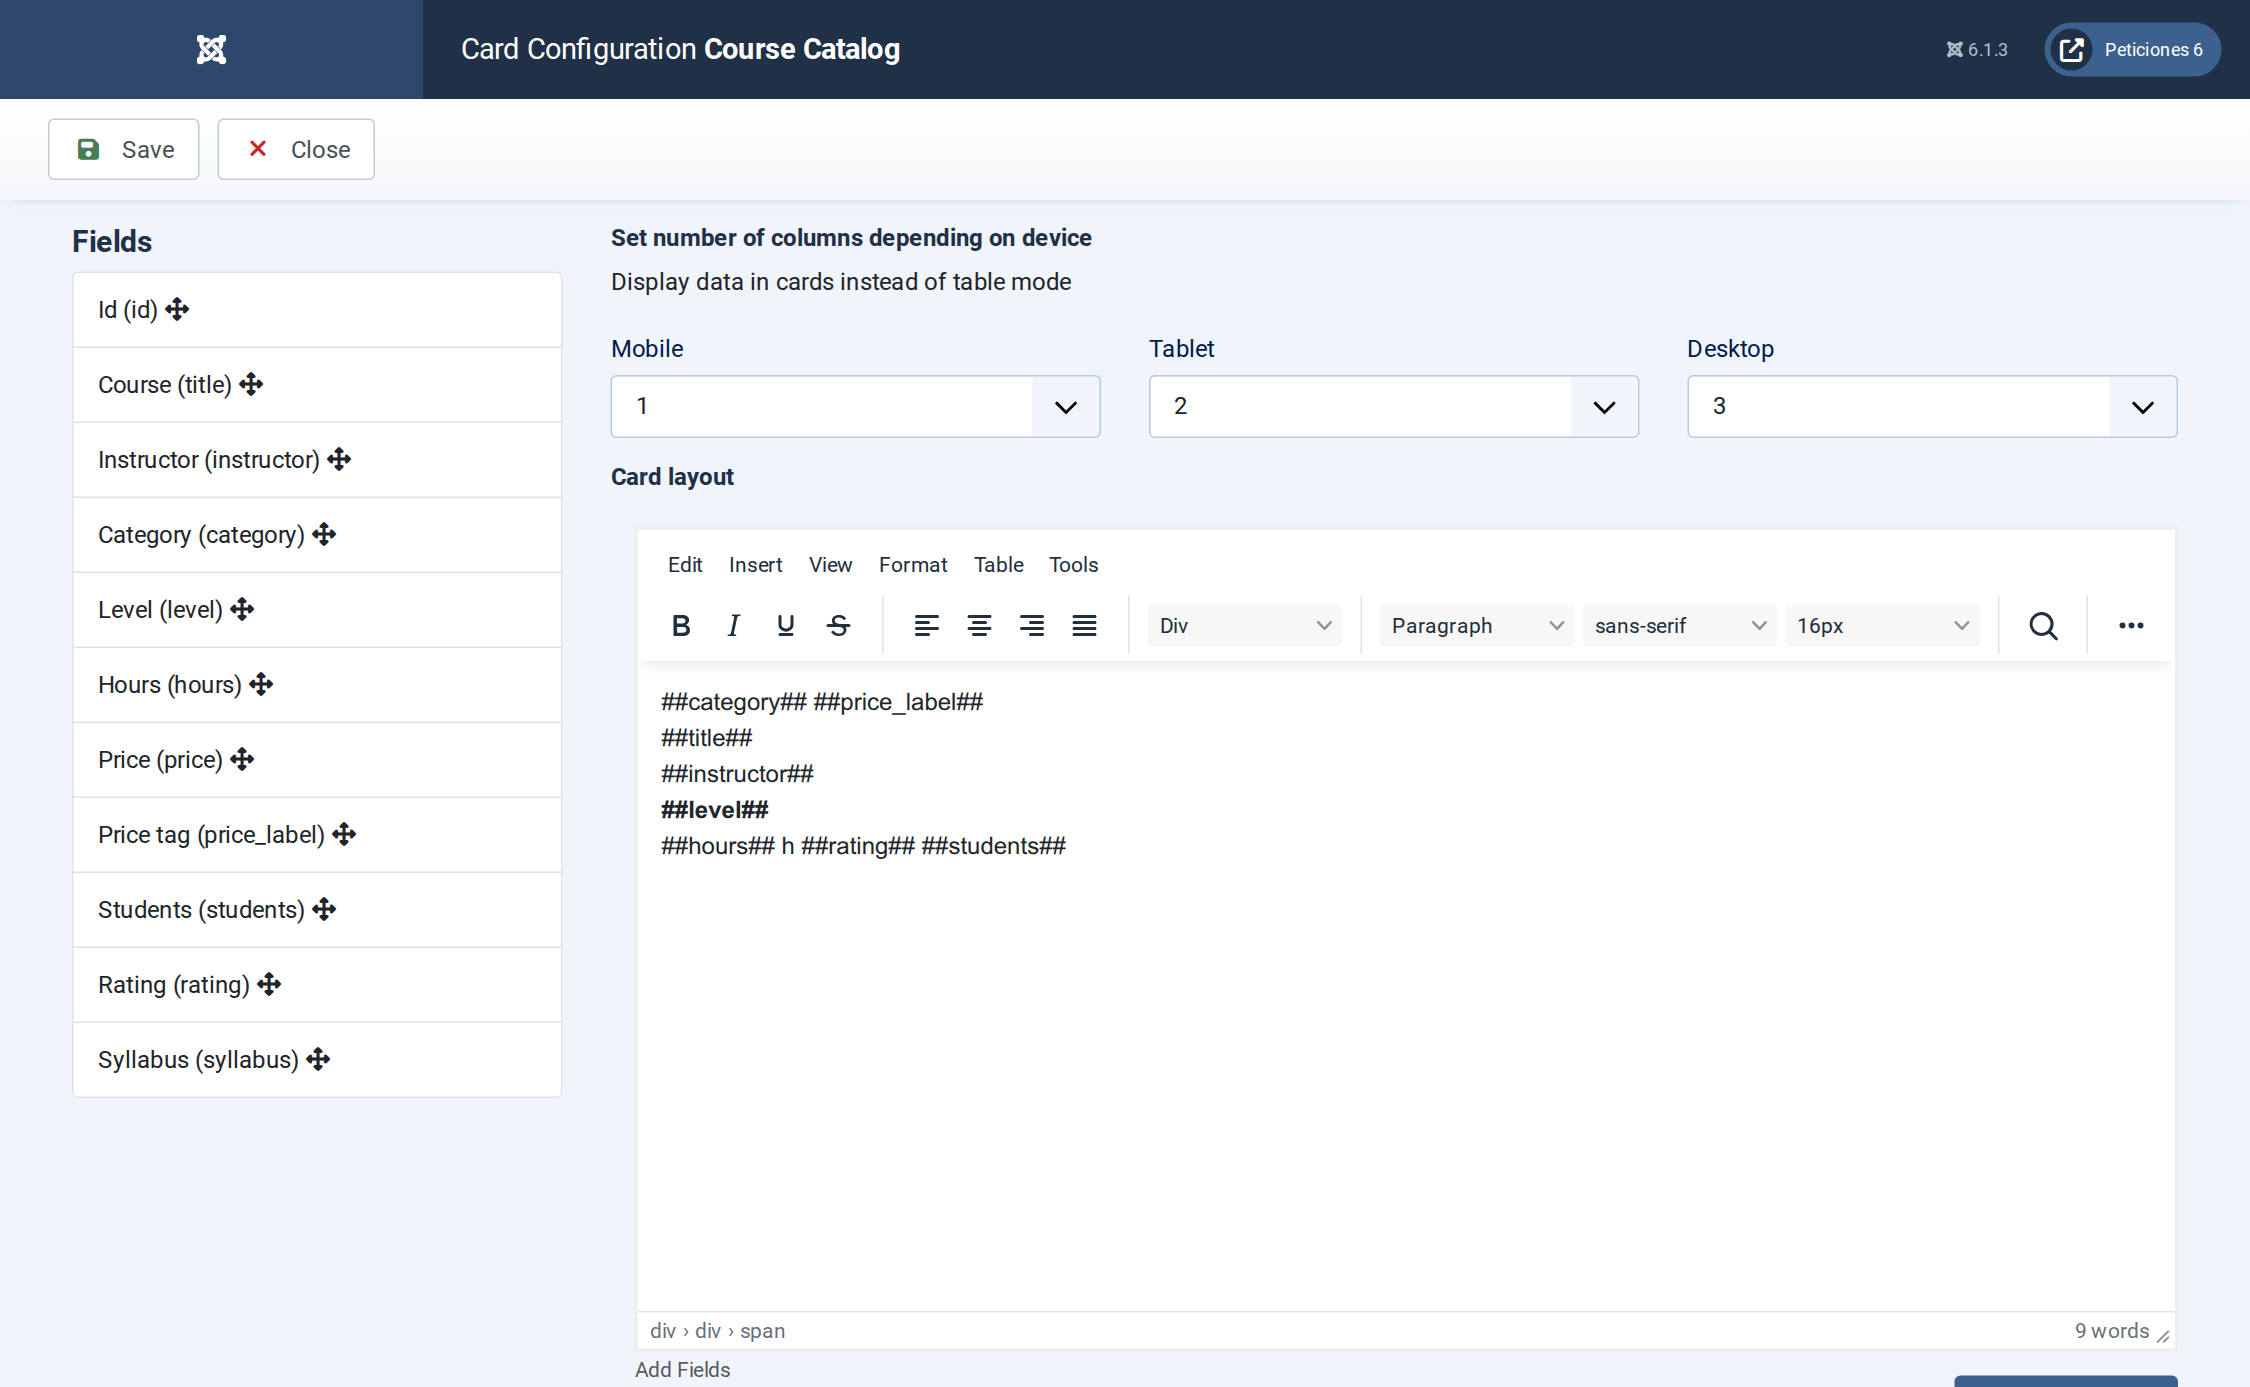
Display › Card: number of columns per device and the card HTML with its placeholders.
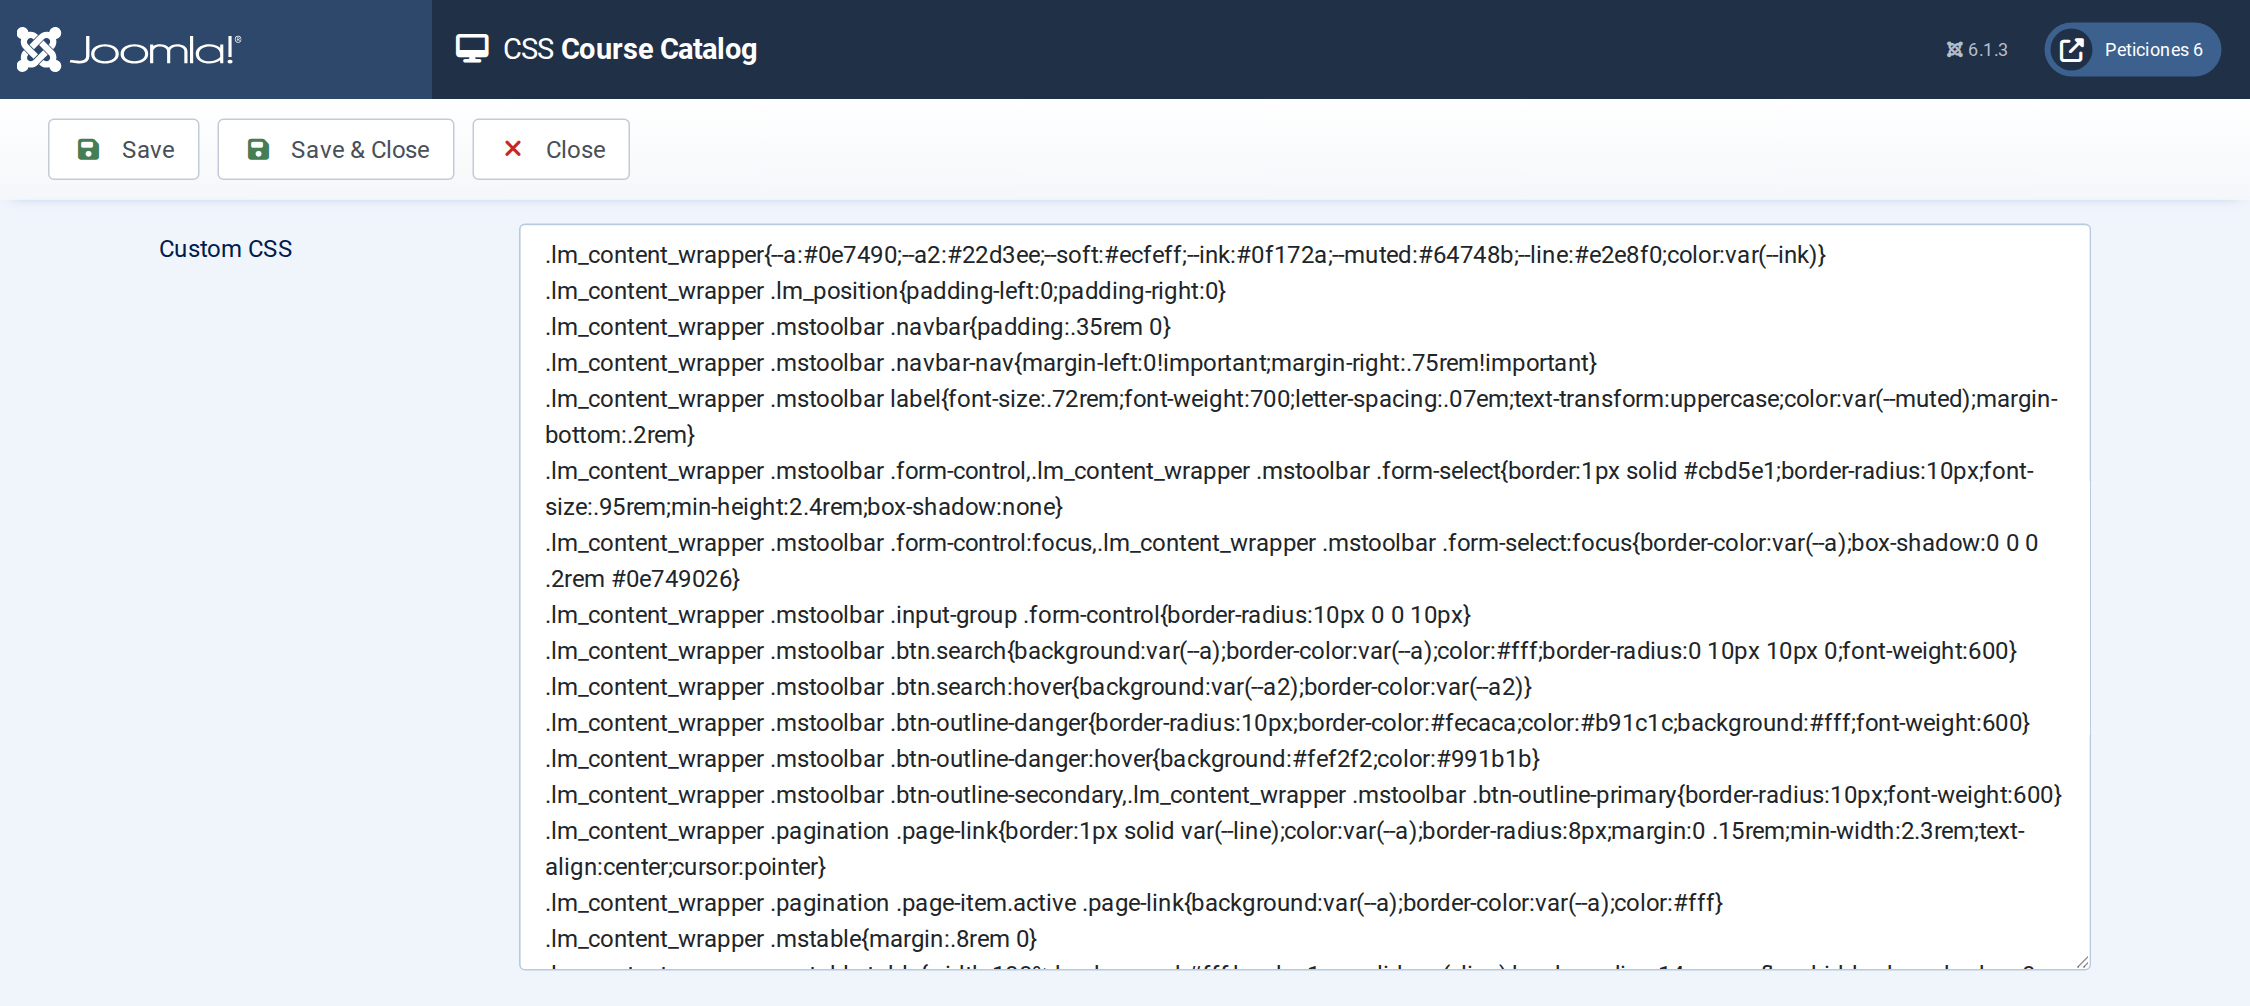
The CSS screen holds the whole design of the toolbar, pagination, cards and detail pop-up.
Want this exact example on your own site?
- Create the table. Run the SQL file in phpMyAdmin (or the mysql client) on your Joomla database. It creates the sample table with its data (the table name has no Joomla prefix and is replaced if it already exists).
- Import the configuration. In your Joomla admin open Components › List Manager › Import and upload the configuration file — it is the same file the component's own Export Configuration button produces.
- Publish it. Create a menu item of type List Manager and select the imported list.