
 List Manager example
Help Desk Tickets
September 21, 2026

Live result on the frontend
The Help Desk Tickets list shows a support team’s queue of thirty tickets, newest first. Agents can scan priorities and statuses at a glance, and a click on a ticket opens the conversation summary.
What it shows
What a support lead sees on the screen:
- Readable statuses and priorities — List Manager prints plain text in table cells, so a few lines of Javascript wrap the status, priority and rating values in a <span> with a data attribute and the CSS colours them: status pills, priority dots and star ratings.
- Urgent rows — a CSS
:has()rule gives every row that contains an urgent priority a rose edge and a tinted background. - Sorting that follows the workflow — priority and status are stored as codes 1–4 in the table and mapped to labels by the option list, so sorting the Priority column orders by urgency instead of alphabetically.
- Date and time — the Created field is a Datetime field; the list script shows the date and the time on two lines.
- Search and filters — a search box over ticket number, subject, requester and the customer message, plus filters for status, priority and agent.
- Conversation pop-up — the detail view shows the customer message and the agent’s reply as chat bubbles, the resolution note and the SLA target.
How it’s built
The list uses the Table layout. The message, reply and resolution columns are loaded but hidden in the table with CSS, so they are available to the detail pop-up (and the message to the search) without making the table too wide. Column widths use td.<column> and th[data-id=<column>] selectors.
Note that the field settings CSS class, prefix and suffix only apply to the edit form, not to table cells; per-value colours therefore come from the small script on the Javascript screen (it re-runs after every filter, sort or page change).
The database is the table lm_tickets with 30 sample rows (see the SQL download); the list configuration is a single XML file created with the Export Configuration button.
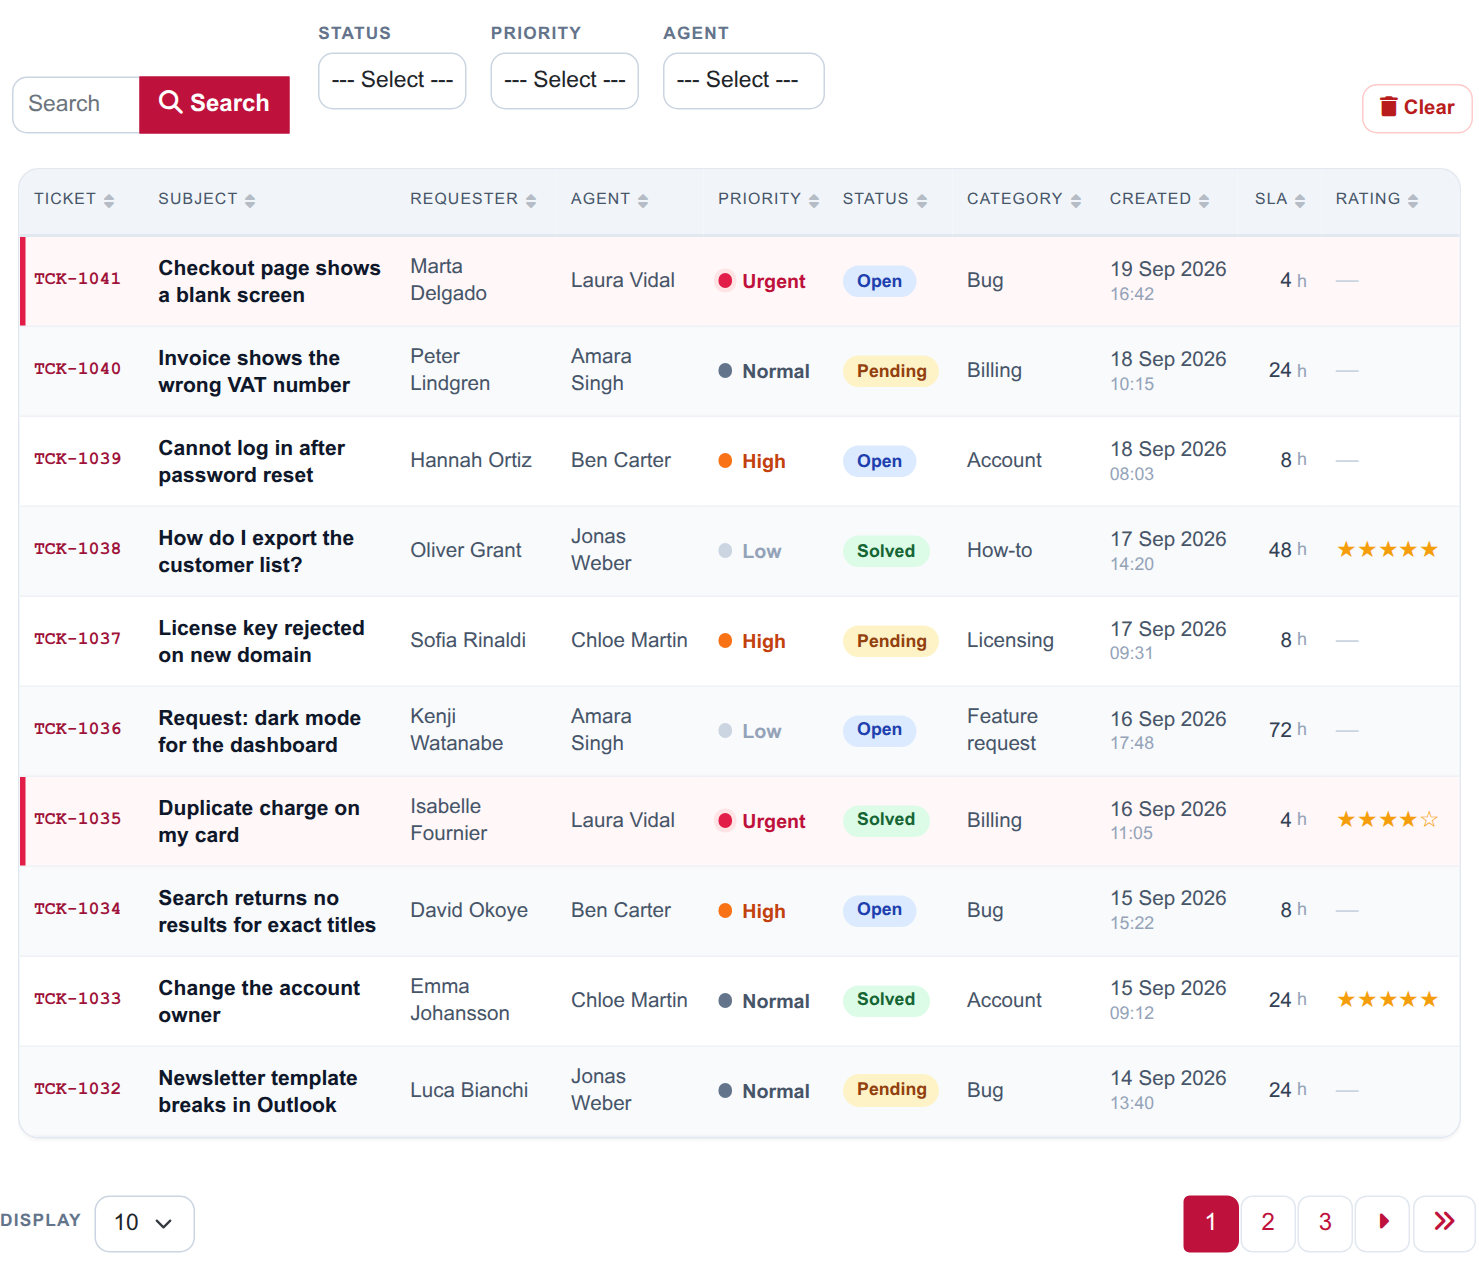
The whole list on the frontend: search, three filters and the ticket table with status pills, priority dots and ratings.
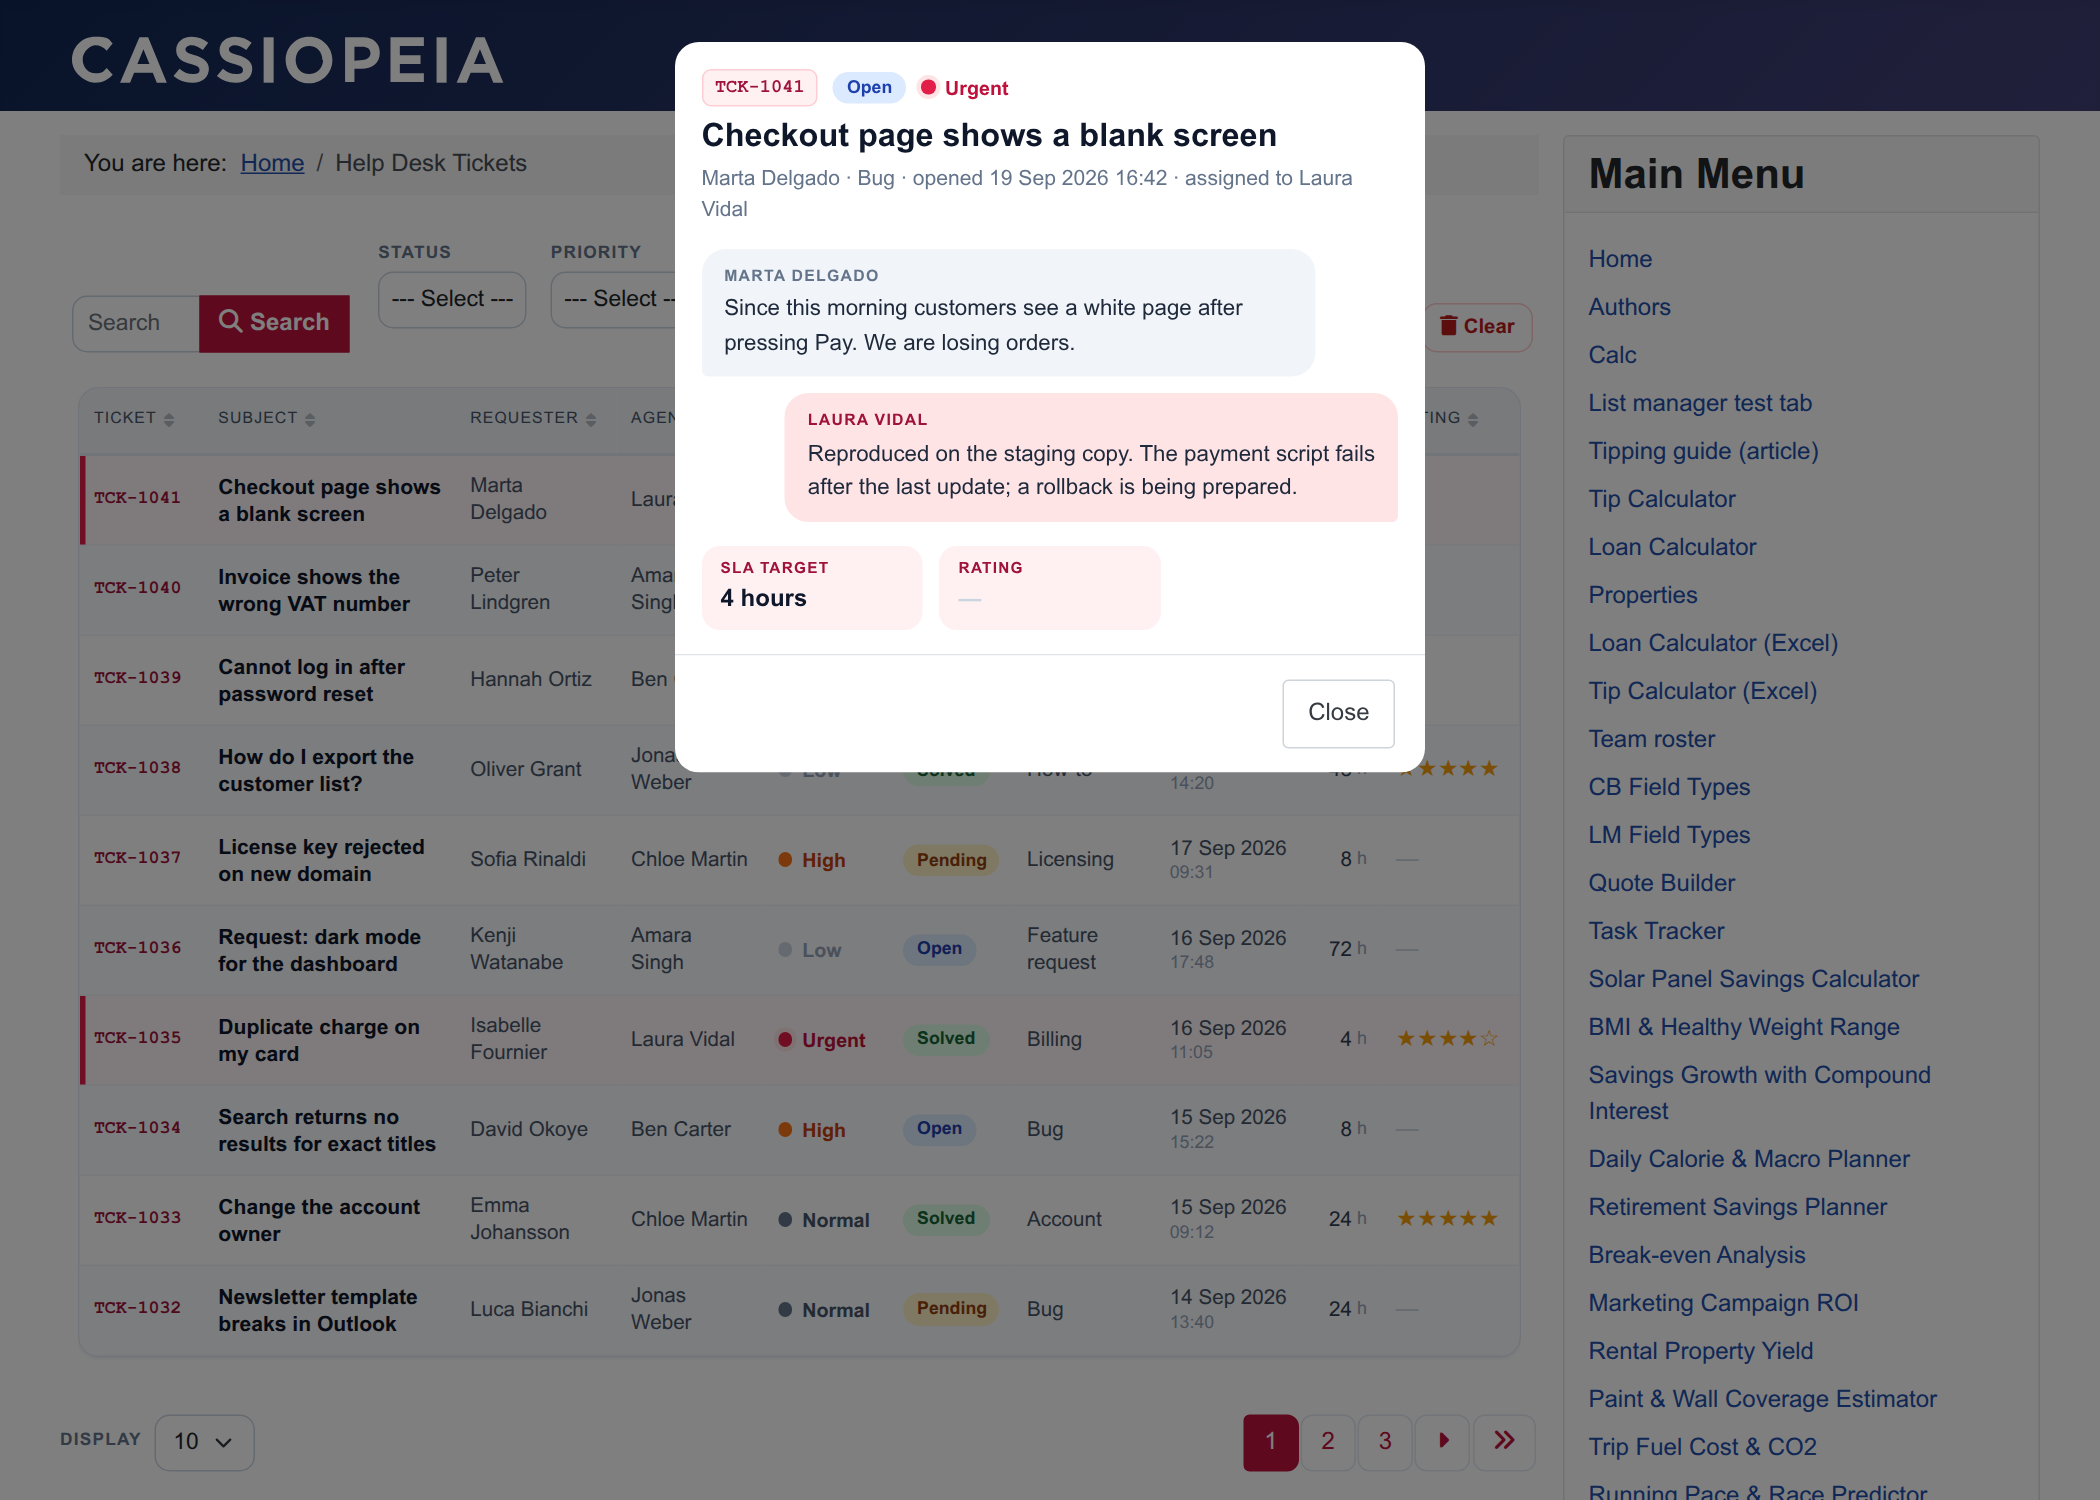
The detail pop-up: ticket header, the customer and agent messages as chat bubbles, the resolution note and the SLA target.
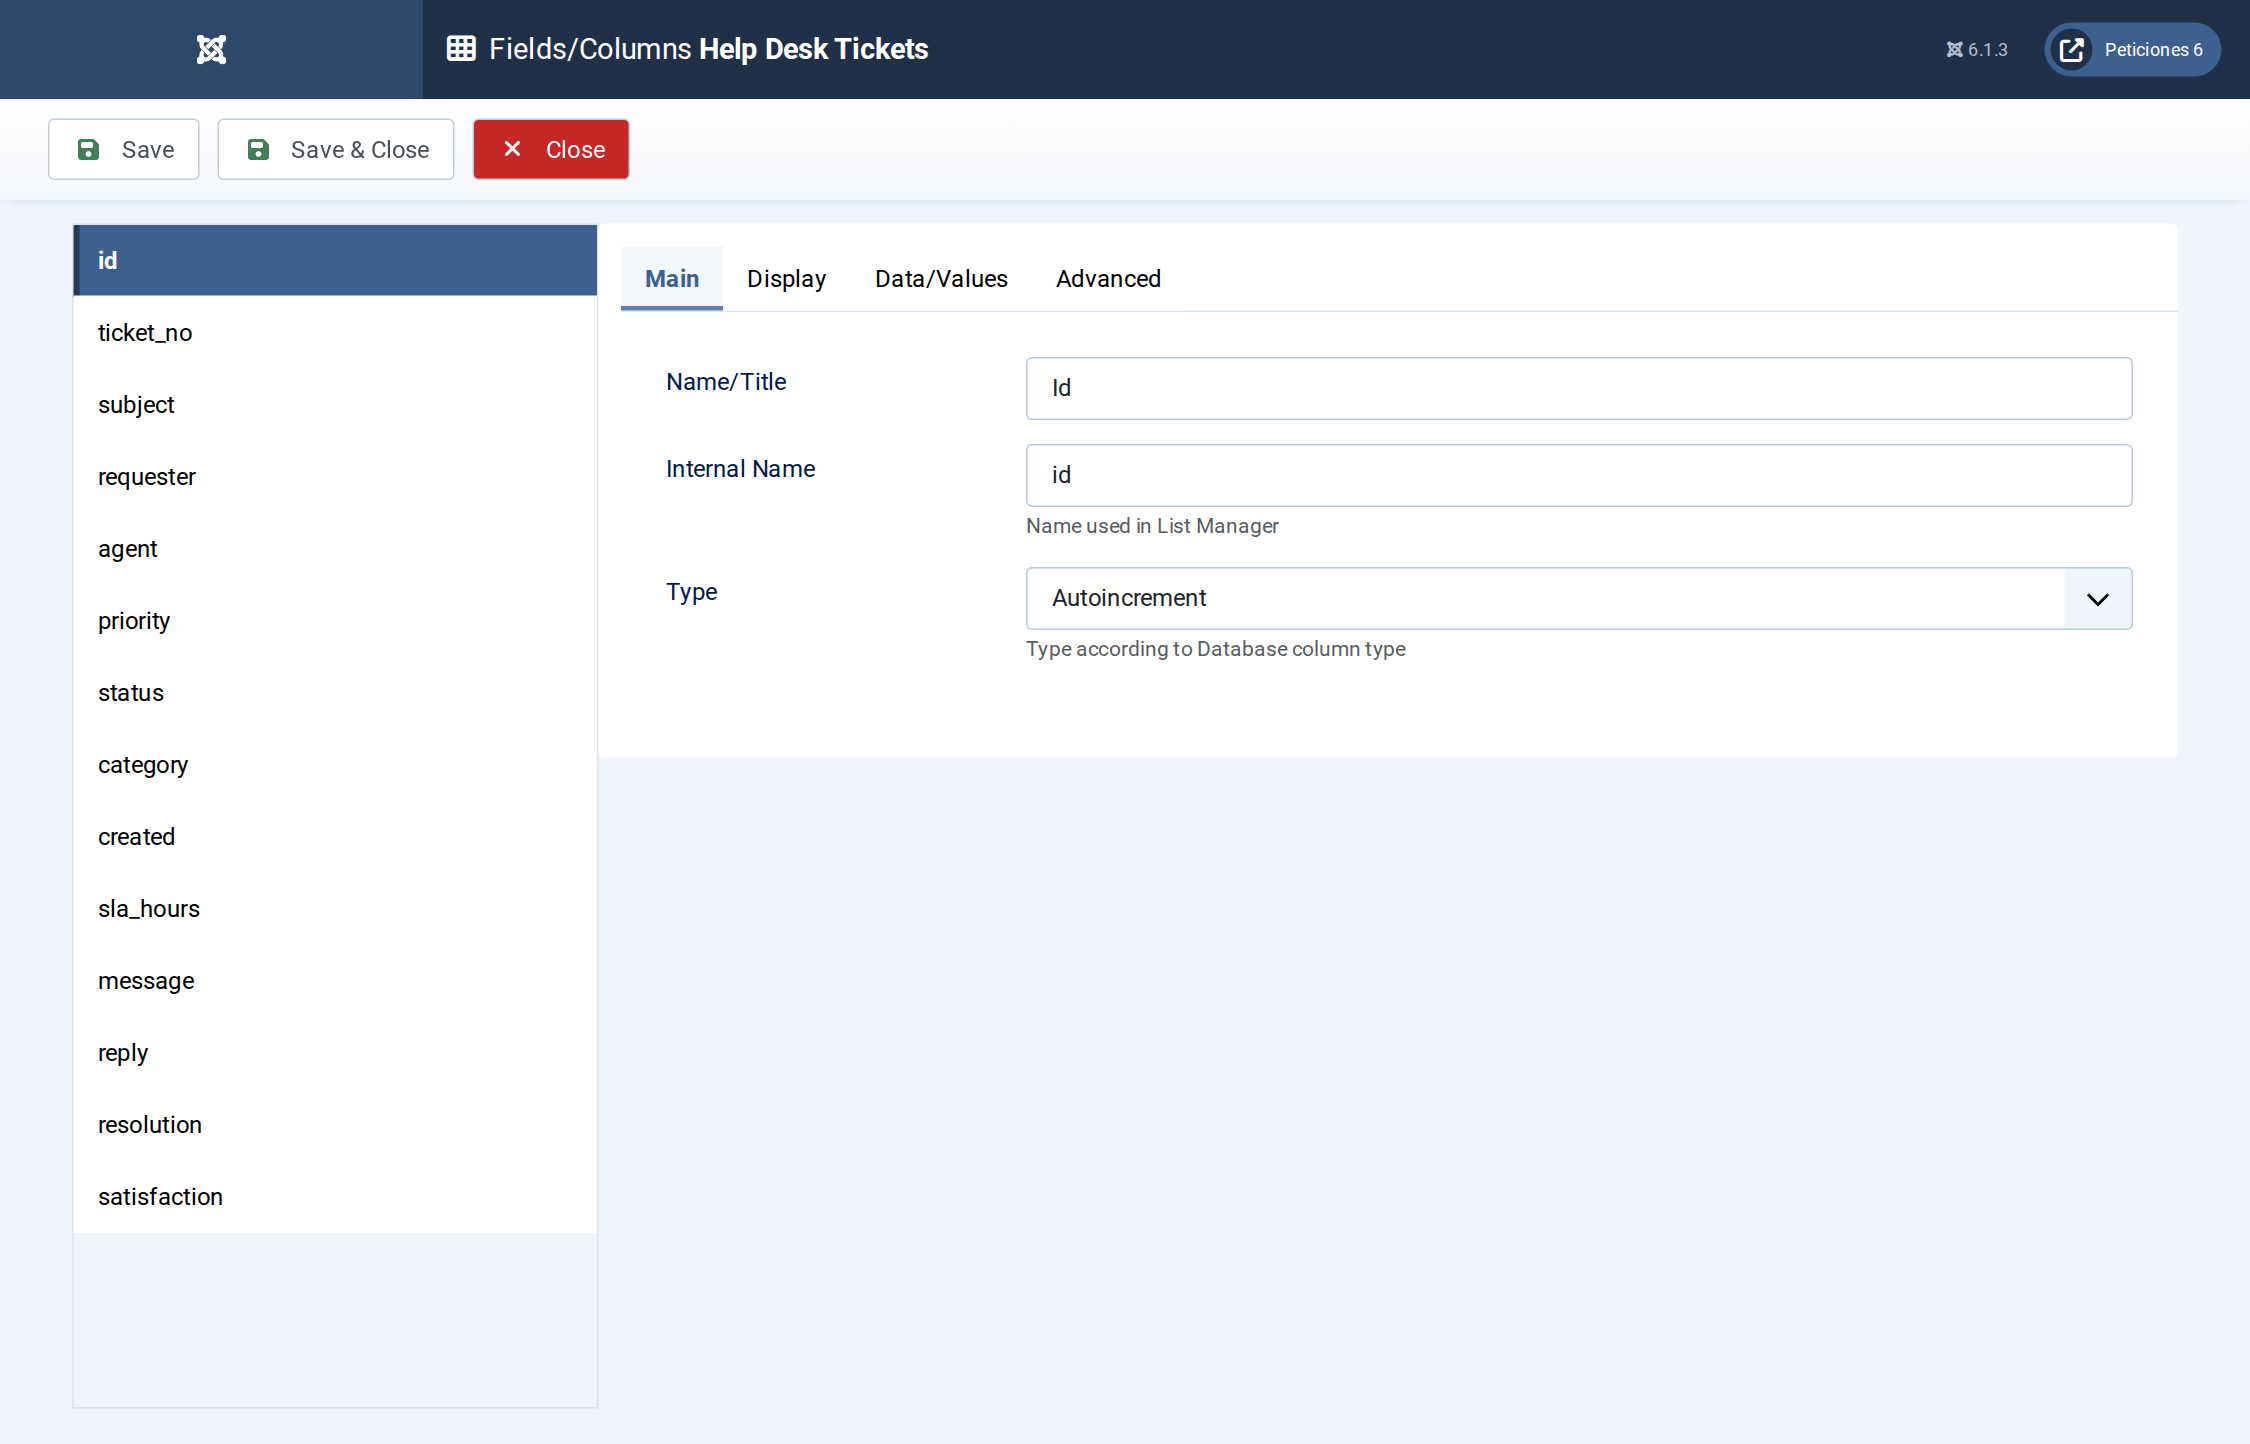
Fields/Columns: ticket data with option lists (value codes and labels), a Datetime field and textareas for the conversation.
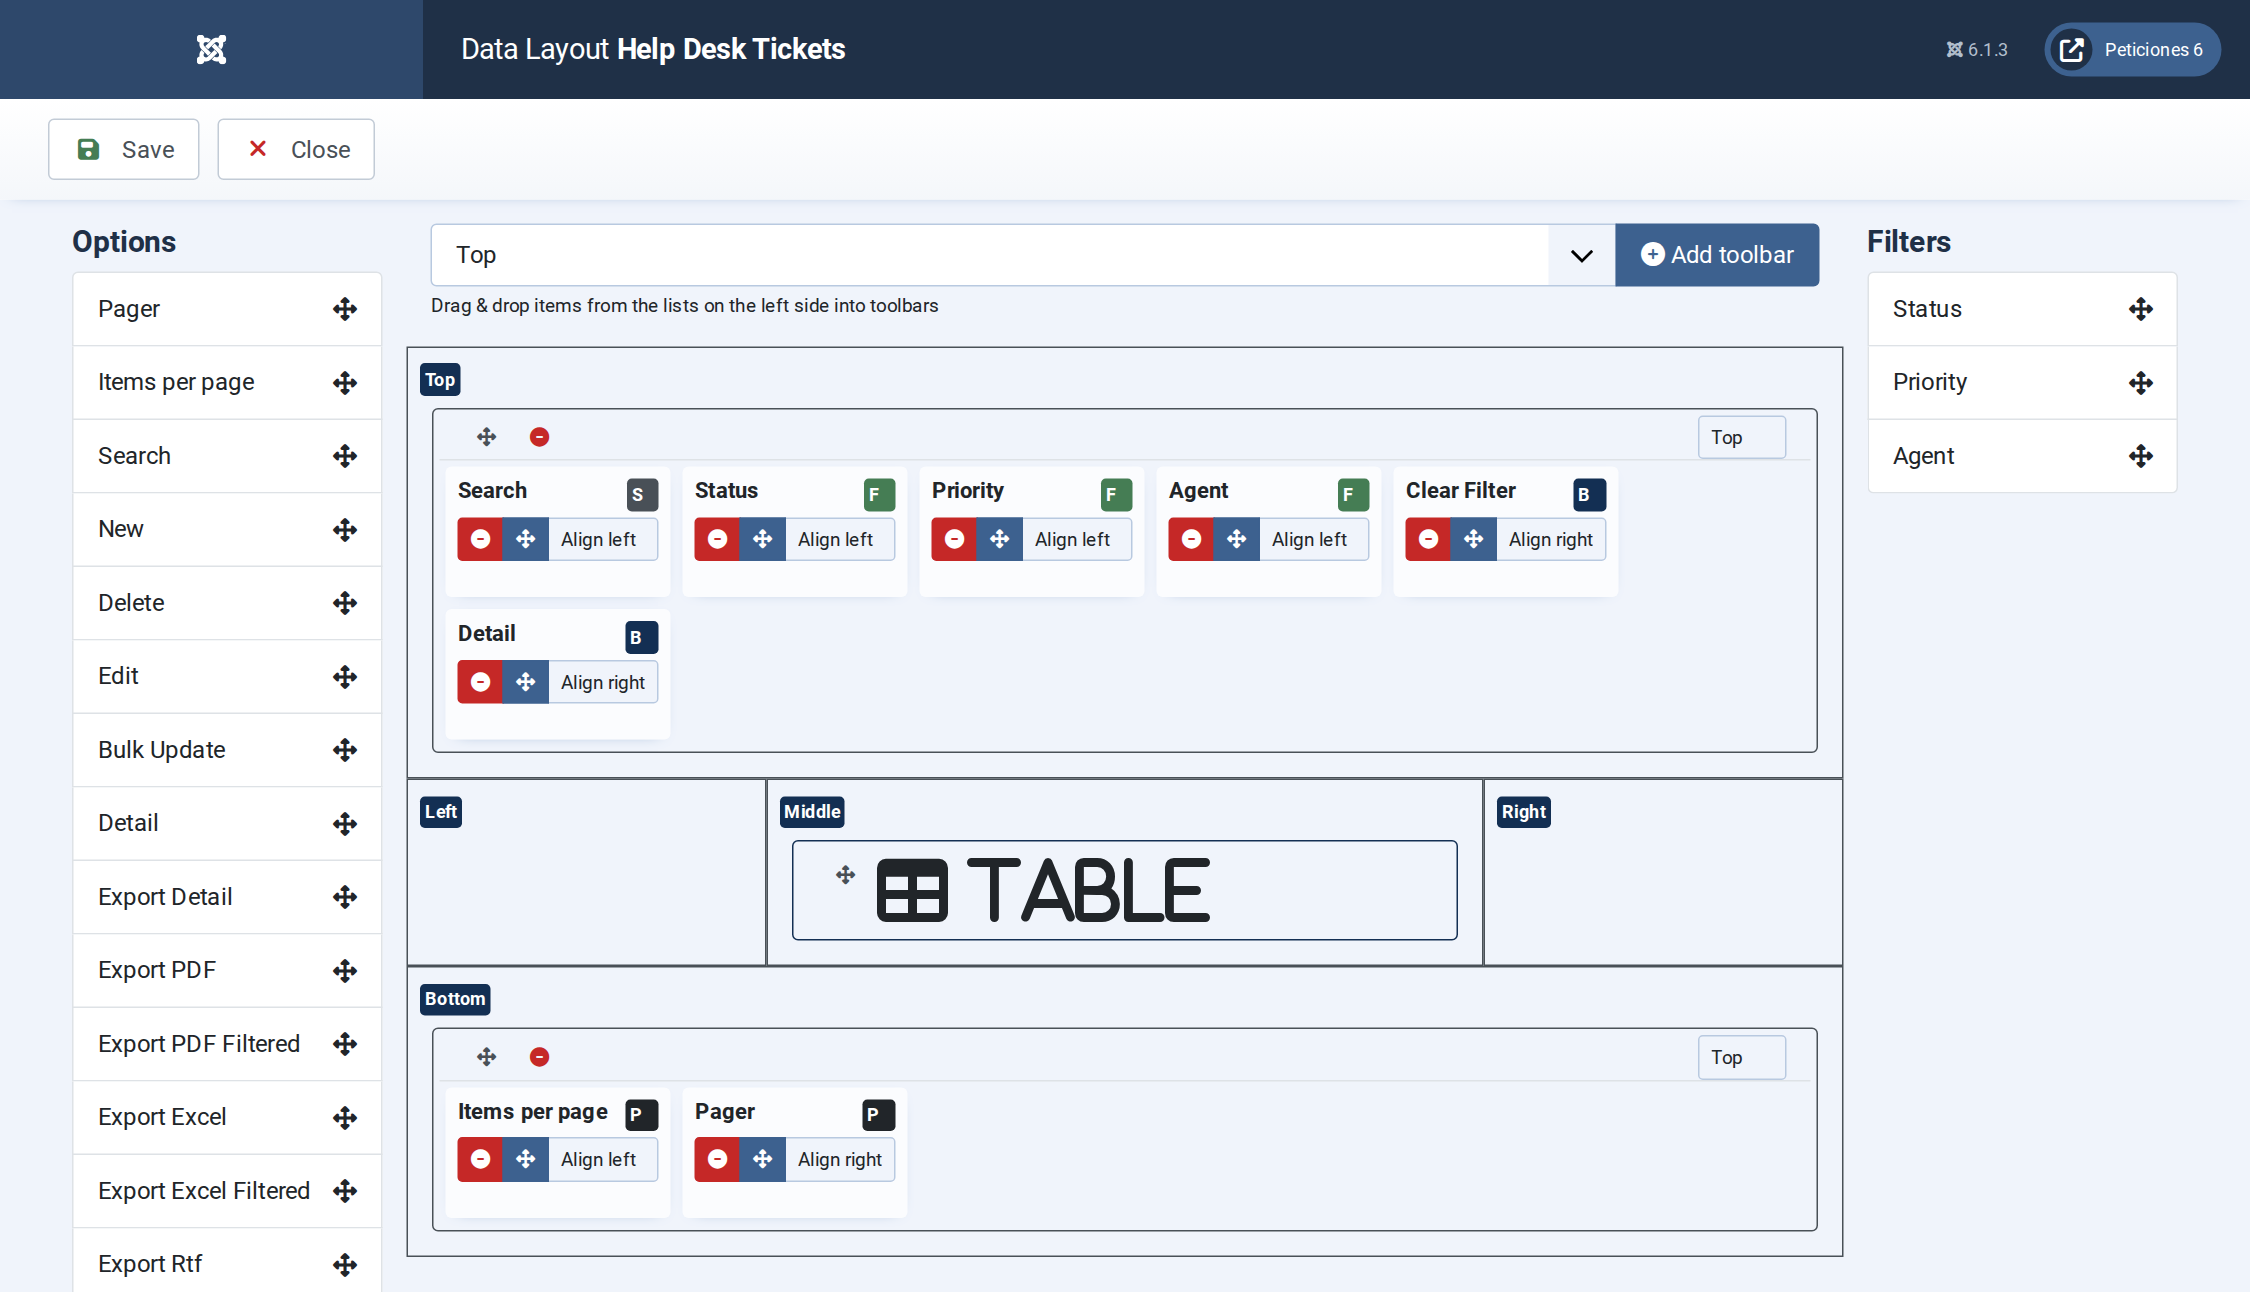
Display › Data Layout: table layout, formats and the default order (created, newest first).
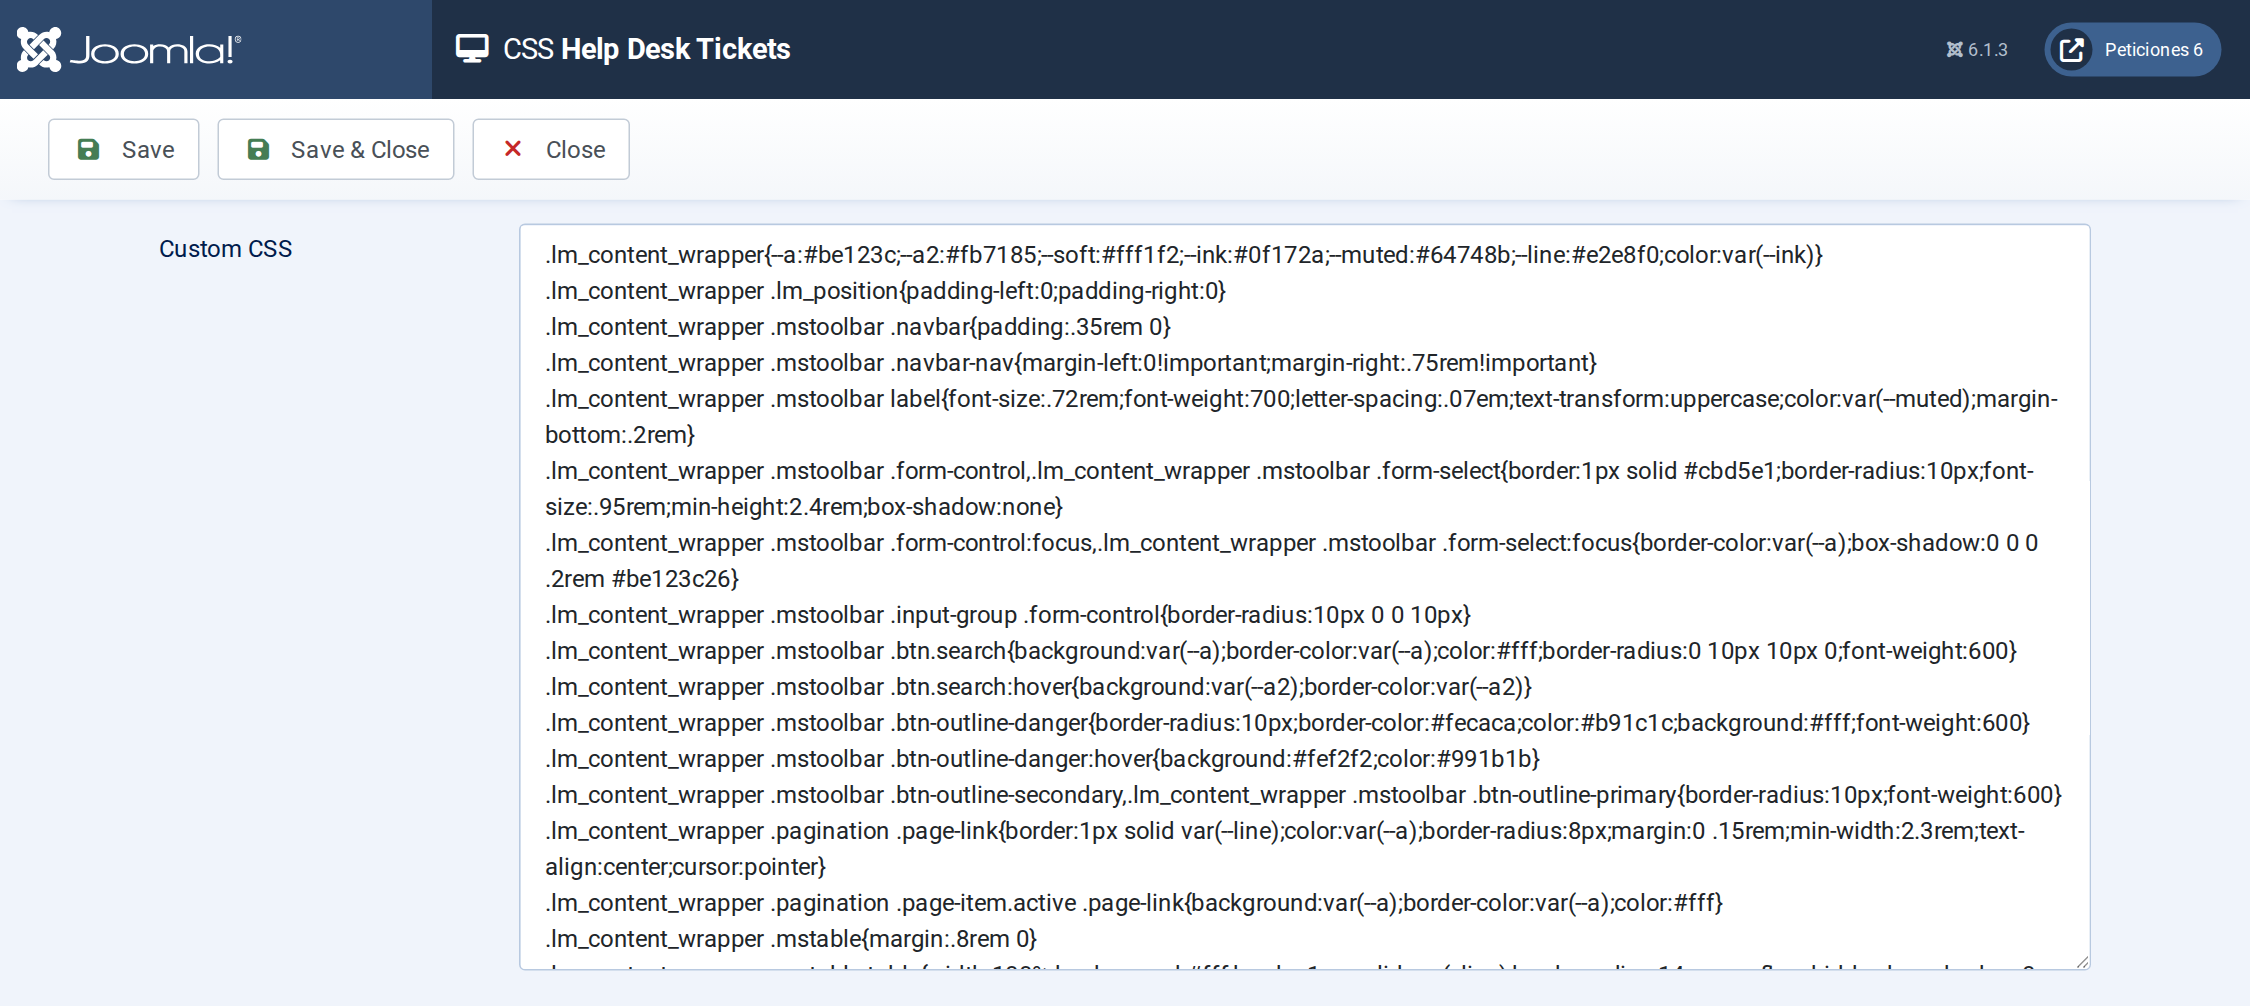
The CSS screen holds the column widths, the pill / dot / star styling, the urgent-row rule and the chat-style pop-up.
Want this exact example on your own site?
- Create the table. Run the SQL file in phpMyAdmin (or the mysql client) on your Joomla database. It creates the sample table with its data (the table name has no Joomla prefix and is replaced if it already exists).
- Import the configuration. In your Joomla admin open Components › List Manager › Import and upload the configuration file — it is the same file the component's own Export Configuration button produces.
- Publish it. Create a menu item of type List Manager and select the imported list.